

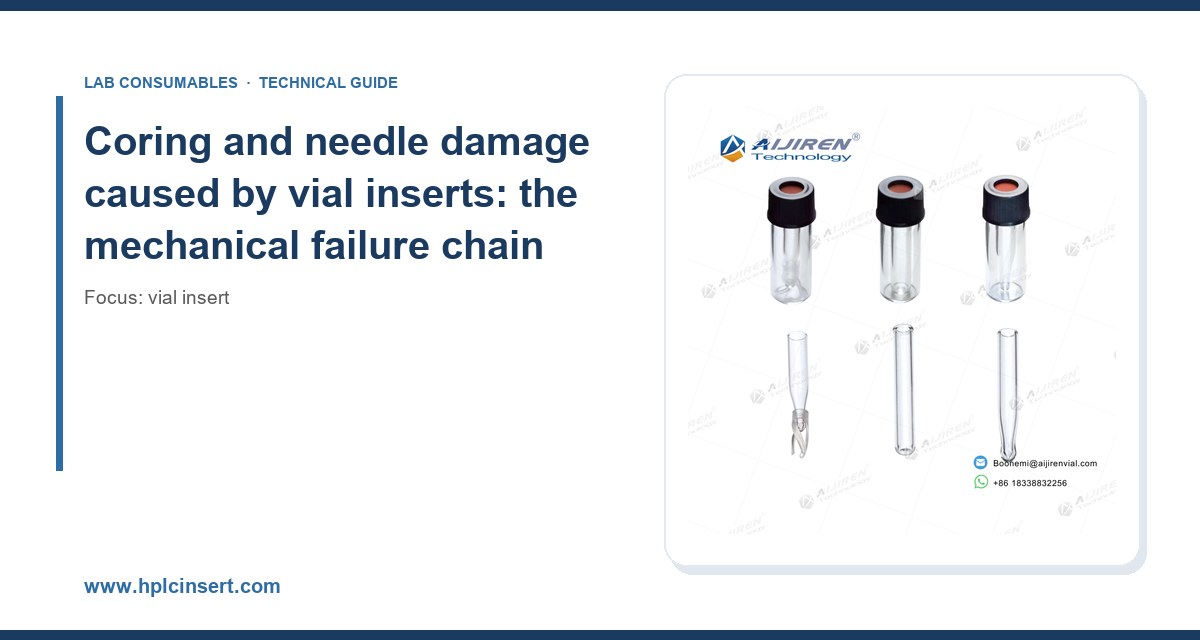
I have pulled more bent needles out of an autosampler than I care to count, and in almost every case the vial insert was the culprit, not the needle. The first time it happened I blamed the sampler. The second time I blamed the needle lot. By the third incident I started keeping a log, and the log pointed straight at the glass sitting inside the vial. This article is about that failure mode specifically: how a vial insert cores septa, bends or burrs needles, and what you can do about it with numbers instead of guesswork.
Coring and needle damage are mechanical problems. They have mechanical causes and mechanical fixes. Once you understand where the needle tip actually goes when it descends into a 300 µL insert sitting inside a 2Ml Vial, the whole failure chain becomes obvious. It also becomes preventable, usually with changes that cost less than a single lost sequence.
A coring event is when the needle punches a plug of septum material instead of piercing cleanly. That plug is called a core. It falls into the vial, or worse, it stays lodged in the needle bore and partially blocks it. A needle damage event is when the needle tip hits something hard enough to bend, burr, or blunt it. On a vial insert system, both events usually start with the same misalignment: the needle is not entering the insert where the sampler thinks it is.
There are three hard surfaces a needle can hit inside a vial with an insert:
- The insert rim, a borosilicate edge typically 0.3 to 0.5 mm thick at the top of a 5 mm OD insert.
- The insert bottom, a flat or conical glass floor that sits 1 to 3 mm above the vial’s own bottom.
- The vial shoulder or neck, if the insert is tilted and the needle path clips the vial wall instead of the insert opening.
Glass wins every one of those collisions. A 23-gauge needle (0.64 mm OD, 0.32 mm ID) in 304 stainless is roughly 180 HV hard. Borosilicate glass is around 500 to 600 HV. The needle bends, the glass chips, or both. When the glass chips, you get shards in the sample and a needle that now has a burr. A burred needle cores the next septum it touches, and the failure cascade is underway.
Why the insert changes the geometry of the needle path
In a standard 2 mL vial with no insert, the needle has a wide target. The vial opening is 6 mm ID at the neck and the internal cavity is about 11.6 mm across. A needle with 0.5 mm of lateral misalignment still lands inside the vial. Put a 5 mm OD insert in that vial and the target shrinks to the insert’s internal bore, typically 3.6 to 4.0 mm ID for a 150 to 300 µL insert. Now 0.5 mm of misalignment is 12 to 14 percent of the available radius. Add a tilted insert and the effective opening drops further.
This is why insert-related needle damage shows up on samplers that were previously fine. The sampler has not changed. The target has. If you want the background on how the sampler and insert interact at the specification level, our piece on Vial Insert geometry covers the fit dimensions. Here I want to stay on the failure itself.
Where the needle actually goes: the three collision zones
I have mapped needle collisions on our own systems and on customer instruments. They cluster into three zones, and each zone has a different signature.
Zone 1: the septum, where coring happens
Septum coring is the most common insert-related failure and the least understood. A standard silicone/PTFE septum is 1.0 mm thick with a 0.5 mm silicone layer and a 0.5 mm PTFE facing. A sharp 23-gauge needle with a 12-degree bevel (a standard HPLC syringe style) will pierce it cleanly for a while. The problem is repeated puncture through the same hole. Most autosamplers do not randomize the puncture point on a 2 mL vial cap; they hit the same spot every injection. After 50 to 100 punctures the silicone layer starts to tear and extrude, and cores begin to appear.
The insert makes this worse in two ways. First, the insert raises the liquid level in the vial, which encourages labs to reduce sample volume and increase the number of injections per vial. Second, an insert that is not seated flat can tilt the vial cap slightly, which changes the angle the needle enters the septum. A 2-degree tilt over a 1 mm septum is enough to turn a clean pierce into a slicing cut that produces cores at 20 to 30 punctures instead of 100.
If you are seeing cores in the vial, check the septum first, not the insert. But then check the insert seating, because a tilted insert is a septum-coring machine.
Zone 2: the insert rim, where needles bend
The insert rim is the top edge of the glass cup. On a 5 mm OD insert the rim is a ring about 0.4 mm wide. If the needle descends and the tip lands on that ring instead of inside the bore, you get a lateral load on a needle that is designed for axial load. Needles are stiff in compression and weak in bending. A 23-gauge needle with 30 mm of exposed length will bend permanently at a lateral load of roughly 2 to 4 N. That is less force than it takes to press a key on a keyboard.
The rim collision happens when the insert is off-center in the vial. Our own incoming inspection rejects inserts with center offset greater than 0.3 mm; good lots run 0.1 to 0.15 mm. A 0.3 mm offset in a 5 mm insert reduces the effective bore target by 0.6 mm on one side. Combined with 0.2 mm of sampler positioning repeatability (typical for a good autosampler, 0.5 mm for an older one), you are now at 0.5 mm of combined error against a 0.5 mm margin. That is a coin flip.
Zone 3: the insert bottom, where needles burr
This is the one that catches people. The needle goes down, enters the insert cleanly, and then hits the bottom because the sampler’s bottom-of-vial setting was programmed for a vial without an insert. The insert bottom sits higher than the vial bottom, and the needle does not know. The tip contacts the glass floor and either bends or, more commonly, the bevel edge gets a burr. The burr is small, often invisible without a loupe, but it changes the needle’s cutting geometry. The next septum puncture cores. The next few injections show increasing peak area RSD because the needle bore is partially blocked.
The safe clearance between needle tip and insert bottom is 0.5 to 1.0 mm. Below 0.5 mm you risk contact. Above 1.5 mm you leave sample behind, which matters for a 150 µL insert. If your sampler allows a bottom-of-vial offset in 0.1 mm increments, set it to 0.6 mm and verify with a dye test (see the checklist below).
Septum coring: the numbers that matter
Coring is a septum problem triggered by insert geometry. Here is what I have measured and what the suppliers publish.
- Silicone/PTFE septum, 1.0 mm: 50 to 100 clean punctures before coring risk rises sharply. This is the standard cap on a 2 mL vial.
- Pre-slit silicone/PTFE septum: 200 to 300 punctures, but the slit leaks on volatile samples and is not suitable for headspace or long GC runs.
- PTFE-faced silicone, 1.5 mm thick: 100 to 150 punctures, better reseal, slightly higher needle penetration force (roughly 1.5 N versus 1.0 N).
- Needle gauge effect: a 22-gauge needle (0.72 mm OD) cores a 1.0 mm septum about 30 percent faster than a 23-gauge (0.64 mm OD) because it removes more material per puncture.
The insert connection is this: an insert lets you run smaller sample volumes, which means more injections per vial, which means more punctures per septum. A lab that used to inject 20 times from a 1.5 mL vial now injects 60 times from a 300 µL insert in the same vial. The septum was never rated for 60 punctures. Cores appear, the needle bore partially blocks, and the sampler starts missing injections or pulling air. The fix is to change caps more often (every 40 to 50 injections with an insert) or move to a pre-slit cap if the sample is non-volatile.
The coring-to-needle-damage link
A core lodged in the needle bore is not just a blocked needle. It is a needle that now has silicone residue on the bevel. Silicone is slippery; it changes the way the needle cuts the next septum. In our logs, a needle that had pulled one core was 3 to 4 times more likely to produce a second core within the next 20 injections. The mechanism is not fully clear, but the pattern is consistent enough that I treat any cored septum as a reason to inspect and likely replace the needle.
Insert seating and tilt: the root cause most labs miss
I have said it twice and I will say it again because it is the single most common root cause I find: the insert is not seated flat. A 5 mm OD insert in a 2 mL vial has roughly 0.5 to 0.8 mm of radial play. If the insert is dropped in rather than pressed down, it can sit at a 2 to 5 degree tilt. The vial cap then clamps down on the insert rim and holds it at that tilt. The needle enters the septum at an angle, tracks down the tilted bore, and either hits the rim or exits the insert sidewall.
How do you detect it? Two methods work:
- Visual with a backlight: hold the capped vial against a bright light and look for a crescent-shaped shadow at the insert rim. A properly seated insert shows an even ring.
- Weight test: an empty 300 µL insert weighs about 0.35 g. A seated insert with sample should not rattle when the vial is gently inverted. If it moves, it is not seated.
Good insert designs have a conical or stepped base that self-centers in the vial’s internal taper. If your inserts have a flat base and a straight wall, they rely entirely on the cap to center them, and the cap is not a centering device. This is one of the reasons I prefer inserts with a molded centering shoulder, even at a small cost premium. The Hplc Consumables range we stock includes both styles; the self-centering ones cost about 15 percent more and reduce rim collisions by an order of magnitude in our internal testing.
Needle damage modes and how to tell them apart
Not all needle damage is the same, and the fix depends on which mode you have. Here is how I classify them.
Bent needle (lateral load)
Signature: the needle is visibly curved or kinked, usually 5 to 15 mm from the tip. Cause: rim collision or vial wall collision from a tilted insert. Fix: replace the needle, then fix the insert seating. A bent needle will not straighten reliably; do not try.
Burred or blunted tip (axial load)
Signature: needle looks straight but the bevel edge is rounded or has a visible burr under 10x magnification. Cause: contact with the insert bottom. Fix: replace the needle, reset the bottom-of-vial offset to 0.6 mm, and run a dye test to confirm.
Plugged bore (coring)
Signature: needle looks fine, but injections show low or erratic peak areas, or the sampler reports a partial loop fill. Cause: septum core lodged in the bore. Fix: clear the bore with a fine wire (0.2 mm) or replace the needle. Then replace the septum and reduce injections per cap.
Bent needle from cap torque
This one is underappreciated. Over-tightening the vial cap deforms the septum and can push the insert down unevenly. The recommended cap torque for a 2 mL screw cap is 0.4 to 0.6 N·m. Hand-tight is usually 0.8 to 1.2 N·m, which is too much. If you use a torque tool, set it to 0.5 N·m. If you cap by hand, stop when the cap just contacts the septum, not when it stops turning.
A troubleshooting checklist for insert-related coring and needle damage
Work through this in order. It is the sequence I use on a service call, and it usually finds the cause within 30 minutes.
- Inspect the needle. Remove it and look at the tip under 10x magnification. Bent, burred, or plugged? Replace it before doing anything else, or you will chase the symptom.
- Inspect the septum. Look for a core hole, a torn slit, or extrusion around the puncture point. More than 50 punctures on a standard septum with an insert? Replace the cap.
- Check insert seating. Backlight test on 5 vials from the run. Any tilt or rattle means the insert is not seated. Check the insert lot for base geometry.
- Measure insert center offset. Use calipers on 10 inserts. Reject the lot if offset exceeds 0.3 mm.
- Verify bottom-of-vial offset. Run a dye test: fill a vial with 200 µL of 0.1% methylene blue, run the sampler’s needle descent without injection, and inspect the needle tip for dye contact. If the tip is wet above the bevel, the offset is too small.
- Check cap torque. If you have a torque tool, verify 0.4 to 0.6 N·m. If not, retrain operators to stop at first contact.
- Review injection count per vial. If you are running more than 50 injections per septum with an insert, either change caps mid-run or switch to a pre-slit septum for non-volatile samples.
- Check sampler alignment. Run a vial position verification (most samplers have a service routine). Positioning repeatability should be under 0.3 mm. If it is worse, the sampler needs service, and no insert will fix it.
If all eight checks pass and you still see coring, the problem is upstream: the needle lot, the septum lot, or the sampler’s Z-axis calibration. At that point, call the instrument vendor. Agilent publishes sampler service procedures and consumable specifications that are worth having on hand; see their Agilent chromatography consumables and columns documentation. Thermo Fisher’s chromatography and sample handling pages cover their autosampler needle and septum specs in similar detail.
Comparison: insert styles and their coring and needle-damage risk
Not all inserts are equal on this failure mode. Here is a decision table based on our own testing and supplier data. Puncture counts are for a 1.0 mm silicone/PTFE septum and a 23-gauge needle.
| Insert style | OD / ID (mm) | Base geometry | Typical punctures before coring | Rim collision risk | Best for |
|---|---|---|---|---|---|
| Straight-wall, flat base, 300 µL | 5.0 / 3.8 | Flat | 40 to 60 | High | Low-volume, few injections |
| Straight-wall, conical base, 300 µL | 5.0 / 3.8 | Conical | 50 to 70 | Medium | General HPLC |
| Self-centering shoulder, 250 µL | 5.0 / 3.6 | Stepped | 70 to 100 | Low | High-throughput sequences |
| Self-centering, 150 µL | 5.0 / 3.2 | Stepped | 60 to 80 | Low | Limited sample volume |
| Glass-insert with polymer foot, 300 µL | 5.0 / 3.8 | Polymer centering foot | 80 to 110 | Very low | Difficult matrices, dirty samples |
The pattern is clear. Self-centering geometry buys you 40 to 60 percent more punctures before coring and cuts rim collisions substantially. The polymer-foot design is the best of the lot for needle protection because the foot absorbs the lateral load that would otherwise bend the needle, but it costs more and the polymer must be solvent-compatible. Check compatibility against your mobile phase before you commit; a foot that swells in DMSO or THF will tilt the insert and undo the benefit.
When to use a pre-slit septum with an insert
Pre-slit septa reduce coring dramatically (200 to 300 punctures) but they leak. Use them only if:
- Your sample is non-volatile (no headspace analysis, no GC).
- Your run time is under 20 minutes per injection.
- You are not running the vial for more than 8 hours.
For volatile samples or long runs, stay with a standard septum and change caps every 40 to 50 injections. The cost of a cap is trivial compared to a lost sequence.
Operational precautions that prevent most of these failures
Here is what I actually do on our own systems, in order of impact.
1. Seat every insert with a consistent method
Do not drop inserts in. Use a seating tool (a plastic rod with a flat end sized to the insert rim) and press until you feel the insert contact the vial bottom. For self-centering inserts, a gentle press is enough. For flat-base inserts, you need to press firmly and check with the backlight test. I have seen labs cut coring by 70 percent just by switching from “drop and cap” to “seat and verify.”
2. Set the bottom-of-vial offset correctly, every time
Program the sampler’s bottom-of-vial offset to 0.6 mm for a 300 µL insert and 0.5 mm for a 150 µL insert. Verify with a dye test after any change to insert lot, vial lot, or needle lot. This one setting prevents most burring.
3. Change septa on a schedule, not on failure
With an insert, change caps every 40 to 50 injections. Write the injection count on the cap with a marker if your sampler does not track it. This is the cheapest reliability improvement available.
4. Inspect needles on a schedule
Replace autosampler needles every 500 to 1000 injections, or immediately after any cored septum. Keep a 10x loupe at the bench. A burred needle is invisible to the naked eye and will quietly ruin a week of data.
5. Control cap torque
Set cap torque to 0.4 to 0.6 N·m. If you cap by hand, train operators to stop at first contact. Over-torque deforms the septum and tilts the insert.
6. Qualify insert lots on center offset and base geometry
Incoming inspection: measure center offset on 10 inserts per lot; reject above 0.3 mm. Check base geometry against the drawing. This is basic incoming QC and it catches the bad lots before they reach the sampler.
For method-specific guidance on sample preparation and insert selection, the U.S. EPA SW-846 test methods for waste and materials are a useful reference for how sample volume and container geometry are specified in regulated methods. Restek’s technical resources for chromatography also have practical notes on septum selection and injection technique that align with what I have described here. If you are sourcing inserts across multiple methods, a Chromatography Supplier with lot-level documentation makes the incoming inspection step much easier.
What to do when you cannot eliminate coring
Sometimes you inherit a method, a sampler, and a sample volume that you cannot change, and coring persists. In that case, the pragmatic fix is to reduce the consequences rather than the cause:
- Switch to a needle with a smaller OD (25-gauge, 0.51 mm) if the method allows. It removes less septum material per puncture and cores about 40 percent slower.
- Use a septum with a PTFE facing on both sides. The PTFE does not tear the way silicone does, and cores are less likely to lodge in the bore.
- Add an in-line filter between the needle and the injection valve if your sampler supports it. A 0.2 µm frit catches cores before they reach the column.
- Run a blank injection after every 20 samples to detect partial blockage early, before it ruins a sequence.
None of these fix the root cause, but they keep you running while you work on the geometry.
Takeaway
Coring and needle damage in vial insert systems are mechanical failures with three specific causes: septum puncture through the same hole too many times, rim collision from a tilted or off-center insert, and tip contact with the insert bottom from a mis-set sampler offset. Fix them in that order. Change caps every 40 to 50 injections, seat inserts with a tool and verify with a backlight, set bottom-of-vial offset to 0.5 to 0.6 mm, cap at 0.4 to 0.6 N·m, and inspect needles under 10x every 500 injections. The inserts themselves matter too: self-centering geometry with a stepped base cuts rim collisions substantially, and it is worth the small premium. If you do those five things, coring drops to near zero and your needles last their full service life. If you skip them, you will keep blaming the sampler for a problem that is sitting in the vial.
References & further reading
Related resources from our lab consumables network:
- Vial Insert at hplcinsert.com
- 2Ml Vial at 2mlsamplevial.com
- Hplc Consumables at hplcconsumable.com
- Chromatography Supplier at chromatographysupplier.com
External references and standards: