

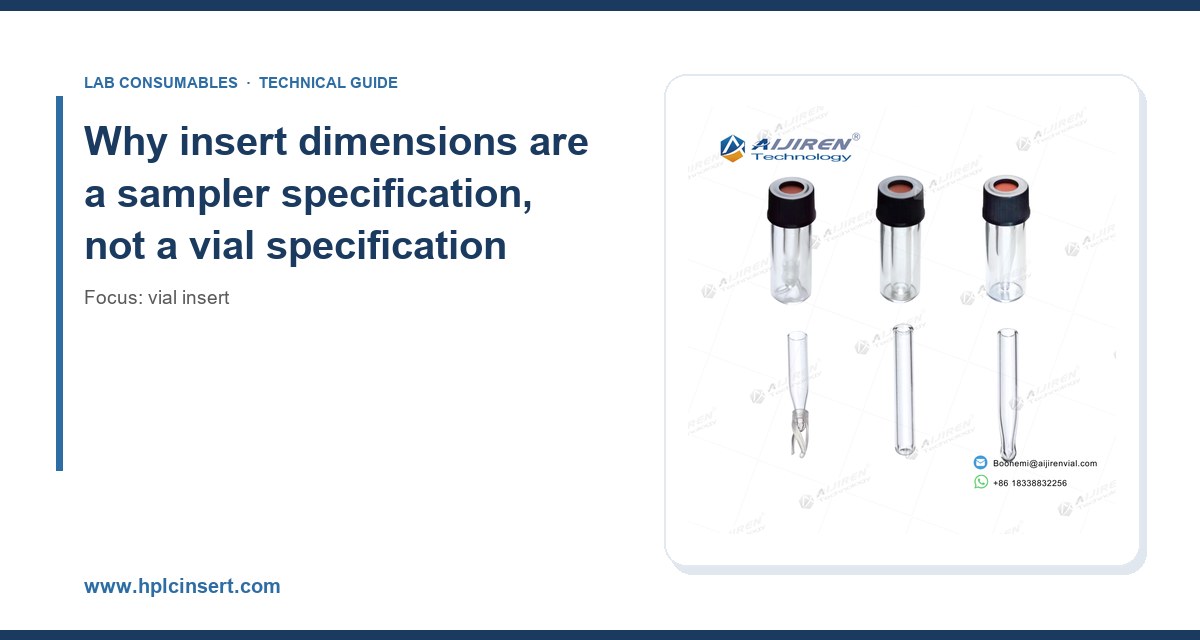
I have lost more hours to a 250 µL insert that sat 1.5 mm too high in a 2 mL vial than to any column problem in the last decade. The autosampler needle came down, clipped the top of the insert, bent, and the run aborted at 2 a.m. The vial was fine. The insert was the wrong height for that particular autosampler. That is what this guide is about: matching insert geometry to the sampler or inlet you actually run, using the numbers that matter, not the marketing copy on the box.
Most labs buy inserts by vial size. They order “250 µL inserts for 2 mL vials” and assume that is the end of it. It is not. The vial is a container. The insert is a mechanical interface between that container and a needle that travels on a fixed vertical stroke with a fixed side-entry angle and a fixed bottom-of-stroke tolerance. The insert has to sit inside a window defined by the sampler, and that window is narrower than most people realize.
I have seen three nominally identical 250 µL inserts from three suppliers, all listed as “for 2 mL vials,” with overall heights of 31.0 mm, 31.5 mm, and 32.2 mm. On an Agilent 7693A autosampler with a standard 10 µL syringe, all three worked. On a CTC PAL with a side-entry needle and a 1.2 mm bottom offset, the 32.2 mm insert caused intermittent needle bending because the needle tip contacted the insert wall during the downstroke. The sampler did not know the insert was taller. It only knew where the vial bottom was.
This is the core problem. The autosampler references the vial, not the insert. Any insert dimension that changes where the needle tip lands relative to the vial bottom is a sampler problem, and the sampler does not care what the catalog said.
The four dimensions that actually govern fit
When I evaluate an insert for a specific sampler, I check four numbers before anything else:
- Overall height (mm): measured from the base of the insert to the top rim. This determines whether the insert protrudes above the vial crimp or sits flush, and whether the needle can reach the bottom of the insert without hitting the wall.
- Outer diameter at the body (mm): typically 6.0 mm for a 2 mL vial insert, sometimes 5.8 mm or 6.2 mm. A 6.2 mm insert in a 2 mL vial with a nominal 6.2 mm ID is a press fit and can crack the vial neck during crimping.
- Inner diameter at the bottom (mm): the conical tip geometry. A 1.0 mm ID tip concentrates the sample but increases the risk of needle contact. A 2.0 mm ID tip is more forgiving but leaves more dead volume.
- Base thickness (mm): the glass or polymer thickness at the bottom of the insert. A 0.8 mm base plus a 0.5 mm vial bottom gives a predictable needle stop; a 1.5 mm base changes the stop by 0.7 mm, which is enough to matter on a 1.0 mm offset sampler.
Get these four right and the insert works. Get any one wrong and you get needle strikes, incomplete aspiration, or cracked vials. The rest of this guide walks through how to match them to your specific instrument.
Matching insert height to autosampler needle travel
The needle travel on an autosampler is a fixed stroke. The sampler moves the syringe down until it hits a mechanical or optical stop, then aspirates. The stop is referenced to the vial bottom, which the sampler detects by a vial-height sensor or by a fixed tray geometry. The insert changes the effective distance from the stop to the liquid.
On a fixed-stroke sampler like the Agilent 7693A or the Shimadzu AOC-20i, the needle stop is set by the tray and the vial. The insert height determines how much of the needle is inside the insert versus above it. If the insert is 31.0 mm and the vial is 32.0 mm internally, the insert sits 1.0 mm below the crimp. The needle enters the vial, travels through the septum, and enters the insert. The bottom of the needle stroke is set by the sampler to a fixed depth below the vial bottom. The insert base thickness must be accounted for in that setting.
On a side-entry sampler like the CTC PAL or the Gerstel MPS, the needle enters at an angle. The insert height and the inner diameter at the top rim determine whether the needle can enter cleanly. A side-entry needle at 15 degrees needs a top opening of at least 4.0 mm to avoid wall contact. A 250 µL insert with a 3.5 mm top opening will cause intermittent needle bending on a side-entry sampler, even if the insert height is correct.
Height windows by common sampler
These are the height windows I have found reliable in practice, measured as overall insert height for a standard 2 mL vial:
- Agilent 7693A / 7683B: 30.5 to 31.5 mm. The 7693A tray references the vial bottom, so a 31.0 mm insert is the sweet spot. A 32.0 mm insert protrudes above the crimp and can interfere with the tray gripper.
- Shimadzu AOC-20i / AOC-20s: 30.0 to 31.5 mm. The AOC-20i has a shorter needle stroke and a tighter bottom offset. A 31.5 mm insert with a 1.0 mm base is the practical maximum.
- CTC PAL (side entry): 30.5 to 31.0 mm, with a top opening of at least 4.0 mm. The side-entry geometry is the constraint, not the height.
- Thermo TriPlus RSH: 30.5 to 32.0 mm. The TriPlus has a more generous bottom offset and tolerates a taller insert, but the tray gripper is less forgiving of inserts that protrude above the crimp.
- Waters 2695 / Alliance (HPLC, not GC): 30.0 to 31.0 mm. The 2695 needle is shorter and the vial tray references the vial bottom. A 31.5 mm insert can cause incomplete aspiration.
If you are running a mixed fleet, the safe common window is 30.5 to 31.0 mm overall height with a base thickness of 0.8 to 1.0 mm. That works on every sampler I have listed. It is not the highest-capacity insert you can buy, but it is the one that will not bend a needle at 2 a.m.
For instrument-specific consumable specs, the manufacturer documentation is the authority. Agilent publishes sampler geometry and consumable compatibility in its chromatography consumables and columns catalog, and Thermo Fisher documents sample handling dimensions in its chromatography and sample handling resources. Read the dimensional drawings, not the marketing summary.
Matching insert capacity to injection volume and needle depth
Capacity is the number printed on the box, but usable capacity is what matters. A 250 µL insert does not hold 250 µL of usable sample. The conical tip has dead volume, the needle has a penetration depth, and the sampler has a minimum aspiration volume. The usable volume is typically 60 to 75 percent of the nominal capacity.
I size inserts by working backward from the injection volume and the number of injections per vial:
- Injection volume: the volume the method draws per injection, in µL.
- Injections per vial: how many times the sampler will draw from the same insert before the vial is replaced.
- Needle dead volume: the volume below the needle tip at the bottom of the stroke, typically 5 to 15 µL depending on the insert tip geometry.
- Safety margin: 20 percent of the nominal capacity, to account for evaporation and meniscus effects.
A 250 µL insert with a 1.0 mm ID conical tip has a dead volume of about 8 µL. If the method injects 10 µL per run and runs 10 injections per vial, the usable volume required is 100 µL plus the 8 µL dead volume plus a 20 percent margin, or about 130 µL. A 250 µL insert is comfortable. A 150 µL insert is marginal. A 100 µL insert will run dry before the tenth injection.
The needle depth matters here too. A sampler that draws from the bottom of the insert needs the needle to reach within 0.5 mm of the tip. A sampler that draws from a fixed height above the bottom needs the insert to have enough liquid above that height. If the insert tip is 1.5 mm deep and the sampler draws from 2.0 mm above the bottom, the sampler is drawing from the conical section, not the cylindrical section, and the aspiration is unreliable.
Capacity selection table
This is the table I use when specifying inserts for a new method:
- 100 µL insert: 1 to 3 injections of 5 µL, single-run screening, GC with a 1 µL injection. Usable volume about 65 µL. Not suitable for multi-injection sequences.
- 150 µL insert: 3 to 6 injections of 5 µL, or 2 to 3 injections of 10 µL. Usable volume about 100 µL. The practical minimum for a multi-injection HPLC sequence.
- 250 µL insert: 6 to 12 injections of 5 µL, or 4 to 6 injections of 10 µL. Usable volume about 170 µL. The workhorse size for most HPLC and GC methods.
- 300 µL insert: 8 to 15 injections of 5 µL, or 5 to 8 injections of 10 µL. Usable volume about 210 µL. Useful when the method needs a larger draw volume or a longer sequence.
- 400 µL insert: 12 to 20 injections of 5 µL. Usable volume about 280 µL. For long sequences on a single vial, but check the height window first, because taller inserts are more likely to protrude above the crimp.
The capacity number on the box is the nominal volume, not the usable volume. I have seen a 250 µL insert deliver only 140 µL of usable sample because the conical tip was 2.5 mm deep and the needle could not reach the bottom 30 µL. That is a 44 percent loss of usable capacity, and it is invisible until the sequence runs dry.
Material and temperature rating: matching the insert to the inlet
The insert material has to survive the inlet temperature and the sample chemistry. Glass is the default, but not all glass is the same, and polymer inserts have a place when the inlet is hot or the sample is sensitive to glass surface activity.
Glass inserts
Most inserts are borosilicate glass (Type I, Class A) with a hydrolytic resistance that meets USP <660>. That is fine for HPLC at ambient temperature and for GC inlets up to 350 °C. Above 350 °C, borosilicate starts to soften and the insert can deform, which changes the needle geometry. For high-temperature GC inlets, use a quartz insert or a deactivated glass insert rated to 400 °C.
Deactivation matters for polar analytes. An untreated glass insert has surface silanol groups that adsorb polar compounds, particularly amines and phenols. A deactivated insert (silanized or coated) reduces adsorption and improves peak shape. I have seen a 15 percent improvement in peak area RSD for a phenol method just by switching from untreated to deactivated glass. The cost difference is a few cents per insert. Use deactivated glass for any method with polar analytes at low concentration.
Polymer inserts
Polypropylene (PP) inserts are common for HPLC and for ion chromatography, where glass can leach sodium and borate. PP is rated to about 120 °C and is not suitable for GC inlets. PTFE inserts are rated to 260 °C and are chemically inert, but they are expensive and the softness of PTFE means the needle can score the wall over repeated injections. I use PTFE inserts only when the sample chemistry demands it, such as high-concentration hydroxide in ion chromatography.
One failure mode I have dealt with: a PP insert in a GC inlet at 250 °C. The insert softened, the needle pushed it sideways, and the injection volume was short by 40 percent for the rest of the sequence. The method had been validated on glass. The lab switched to PP to save money and did not revalidate. The data looked plausible, which is the worst kind of failure.
Temperature rating checklist
- HPLC at ambient to 40 °C: borosilicate glass or PP. Glass is the default; PP for ion chromatography or where sodium leaching is a concern.
- GC inlet at 200 to 300 °C: borosilicate glass, deactivated for polar analytes. PP is not acceptable.
- GC inlet at 300 to 350 °C: borosilicate glass or quartz. Check the insert rating; not all borosilicate is rated to 350 °C.
- GC inlet above 350 °C: quartz or high-temperature deactivated glass rated to 400 °C. Standard borosilicate is out.
- Ion chromatography: PP or PTFE. Glass leaches sodium and borate.
- Trace metals analysis: PP or PTFE. Glass leaches boron, sodium, and silicon.
Crimp, septum, and torque: the interface between insert and vial
The insert sits inside the vial, and the vial is sealed with a crimp cap and septum. The crimp torque and the septum thickness affect how the insert sits and whether the needle can enter cleanly. This is where a lot of labs get into trouble without realizing it.
A standard 11 mm crimp cap for a 2 mL vial is crimped to a torque of about 1.5 to 2.0 N·cm on a manual crimper, or 2.0 to 2.5 N·cm on an automated crimper. Over-crimping (above 3.0 N·cm) compresses the septum and can push the insert down, changing the needle depth. Under-crimping (below 1.0 N·cm) leaves the septum loose, and the insert can shift during transport or in the tray.
The septum thickness matters too. A 1.0 mm septum is standard for HPLC. A 1.5 mm septum is used for GC to reduce septa bleed, but it changes the needle penetration depth by 0.5 mm. If the method was validated with a 1.0 mm septum and the lab switches to 1.5 mm, the needle reaches 0.5 mm less deep into the insert, which can leave the needle tip in the conical section instead of the cylindrical section. That is enough to cause a 5 to 10 percent RSD increase on a method that was previously at 1 percent.
The GPI 11 mm crimp finish is the standard for 2 mL vials, and the insert dimensions are referenced to that finish. If you are using a non-standard vial or a screw-thread vial with an adapter, check that the insert height is referenced to the adapter, not the vial. I have seen a screw-thread vial with a 11 mm adapter that added 1.2 mm to the effective vial height, which pushed a 31.0 mm insert into the needle path.
Crimp and septum checklist
- Crimp torque: 1.5 to 2.5 N·cm. Check with a torque tester every 500 crimps. Replace the crimper jaw when it drifts more than 0.3 N·cm.
- Septum thickness: 1.0 mm for HPLC, 1.5 mm for GC. Do not mix within a method without revalidating the needle depth.
- Septum material: silicone for HPLC, silicone/PTFE for GC. PTFE-faced septa reduce coring but are harder to penetrate.
- Crimp finish: GPI 11 mm for 2 mL vials. Verify the insert height against the crimp finish, not the nominal vial height.
- Insert seating: the insert should sit flat on the vial bottom with no rocking. A rocking insert changes the needle depth by up to 0.5 mm.
Puncture counts and re-use limits
Every septum has a puncture limit, and every insert has a needle-contact limit. The septum is the consumable that fails first, but the insert can fail too if the needle scores the wall or the tip.
A standard silicone septum is rated for about 50 to 100 punctures before coring becomes a problem. A PTFE-faced septum is rated for 100 to 200 punctures. In practice, I replace septa every 50 injections for HPLC and every 30 injections for GC, because the GC needle is larger and cores the septum faster. A cored septum drops a silicone plug into the insert, which can block the needle or contaminate the sample.
The insert itself does not have a formal puncture limit, but the needle contact point at the bottom of the insert wears over time. A glass insert with a 1.0 mm ID tip can develop a visible score mark after about 200 injections if the needle is contacting the wall. Once the score mark is deep enough, the insert can crack at the tip, and the crack is a source of glass particles in the sample. I inspect inserts under a loupe every 100 injections and replace any insert with a visible score mark or chip.
For methods that run hundreds of injections per vial, consider a wide-mouth insert with a 2.0 mm ID tip. The wider tip reduces needle contact and extends the insert life, at the cost of about 10 µL of additional dead volume. For a 250 µL insert, that is a 4 percent capacity loss for a significant reduction in needle wear.
Troubleshooting checklist: when the insert does not fit
When an insert-related problem shows up, I work through this checklist in order. It catches about 90 percent of the issues I have seen.
- Needle bending or bending at the top of the insert: insert is too tall for the sampler, or the top opening is too narrow for a side-entry needle. Check overall height against the sampler window and top opening against the needle entry angle.
- Incomplete aspiration or low injection volume: insert is too short, or the base is too thick, or the needle is not reaching the bottom. Check insert height, base thickness, and needle depth setting.
- High RSD or drifting peak area: needle is drawing from the conical section, or the insert is not seated flat, or the septum is coring. Check insert seating, septum condition, and needle depth.
- Cracked vial neck after crimping: insert outer diameter is too large for the vial ID. Check insert OD against the vial ID; a 6.2 mm insert in a 6.2 mm vial is a press fit and will crack the neck.
- Insert floating or shifting in the tray: insert is too short, or the crimp is too loose. Check insert height against the vial internal height and crimp torque against the 1.5 to 2.5 N·cm range.
- Glass particles in the sample: insert tip is cracked or scored. Inspect under a loupe and replace.
- Sample evaporating before the run: septum is loose or the insert is too tall and protruding above the crimp. Check crimp torque and insert height.
- Peak shape degradation for polar analytes: insert is untreated glass and adsorbing the analyte. Switch to deactivated glass.
If the checklist does not resolve the problem, the next step is to measure the actual insert and vial dimensions with calipers, not to trust the catalog. I have found inserts that were 0.7 mm out of spec on overall height, and vials that were 0.4 mm out of spec on internal depth. The combination was enough to cause intermittent needle strikes on a sampler that had run the same method for years.
Where to buy and what to specify
When I specify inserts for a lab, I put the following on the purchase order, not just the catalog number:
- Overall height: 30.5 to 31.0 mm, measured, with a tolerance of ±0.2 mm.
- Outer diameter: 6.0 mm ±0.1 mm, to fit a standard 2 mL vial with a 6.2 mm ID.
- Inner diameter at tip: 1.0 mm for standard methods, 2.0 mm for high-injection-count methods.
- Base thickness: 0.8 to 1.0 mm, measured.
- Material: borosilicate glass, Type I Class A, deactivated for polar analytes.
- Temperature rating: 350 °C minimum for GC, ambient for HPLC.
- Certification: USP <660> hydrolytic resistance, and a certificate of analysis with dimensional measurements.
The dimensional tolerance is the part most suppliers will not put on a certificate unless you ask. Ask. A ±0.5 mm tolerance on overall height is not good enough for a sampler with a 1.0 mm bottom offset. A ±0.2 mm tolerance is what you need, and it is available from suppliers who actually measure their product.
For the vial side of the interface, the 2 mL vial dimensions and crimp finish need to match the insert. A vial with a 6.2 mm ID and a GPI 11 mm crimp is the standard, but I have seen vials with a 6.0 mm ID that will not accept a 6.0 mm insert without a press fit. Measure the vial ID before you commit to an insert OD.
For the broader consumables picture, including septa, caps, and syringes that interface with the insert, the HPLC consumables catalog is a useful reference for cross-checking part numbers. And if you are sourcing for a multi-site operation, a chromatography supplier that stocks dimensional certificates is worth the small price premium over a supplier that only lists nominal dimensions.
For method-specific requirements, the regulatory documents are the authority. The U.S. EPA SW-846 test methods specify sample container and preservation requirements for waste and materials testing, and the insert must meet those requirements for volume and material. Restek technical resources publish insert and inlet geometry guidance that is worth reading before you specify a new method.
Decision checklist: insert selection by sampler and method
This is the checklist I hand to a lab manager who is specifying inserts for a new method. It takes about 15 minutes to work through and prevents most of the problems in this guide.
- Step 1: identify the sampler. Fixed-stroke (Agilent 7693A, Shimadzu AOC-20i) or side-entry (CTC PAL, Gerstel MPS)? This sets the height window and the top opening requirement.
- Step 2: measure the vial. Internal depth and internal diameter, with calipers. Do not trust the nominal dimensions.
- Step 3: calculate usable volume. Injection volume × injections per vial + needle dead volume + 20 percent margin. Select the smallest insert that meets this.
- Step 4: check the height window. Overall height within 30.5 to 31.0 mm for a mixed fleet, or the sampler-specific window if single-instrument.
- Step 5: check the temperature rating. Insert rating at least 50 °C above the inlet temperature. Glass for GC, PP or glass for HPLC.
- Step 6: check the material compatibility. Deactivated glass for polar analytes, PP or PTFE for ion chromatography or trace metals.
- Step 7: specify the tolerance. ±0.2 mm on overall height and OD, with a certificate of analysis.
- Step 8: set the crimp torque. 1.5 to 2.5 N·cm, checked every 500 crimps with a torque tester.
- Step 9: set the septum replacement interval. 50 injections for HPLC, 30 for GC, or when coring is visible.
- Step 10: inspect inserts every 100 injections. Loupe inspection for score marks or chips at the tip.
Takeaway
An insert is a mechanical interface, and matching it to your sampler is a dimensional problem with a small number of numbers. Overall height in the 30.5 to 31.0 mm window, outer diameter of 6.0 mm ±0.1 mm, base thickness of 0.8 to 1.0 mm, and a tip inner diameter of 1.0 to 2.0 mm depending on injection count. Those four dimensions, plus a temperature rating and a material that matches the sample chemistry, will keep you out of the failure modes that cost the most time. The vial insert selection should start with the sampler specification, not the vial size, and it should end with a certificate of analysis that confirms the dimensions you specified. Anything less is a guess, and a guess at 2 a.m. is how needles get bent.
References & further reading
Related resources from our lab consumables network:
- Vial Insert at hplcinsert.com
- 2Ml Vial at 2mlsamplevial.com
- Hplc Consumables at hplcconsumable.com
- Chromatography Supplier at chromatographysupplier.com
External references and standards: