

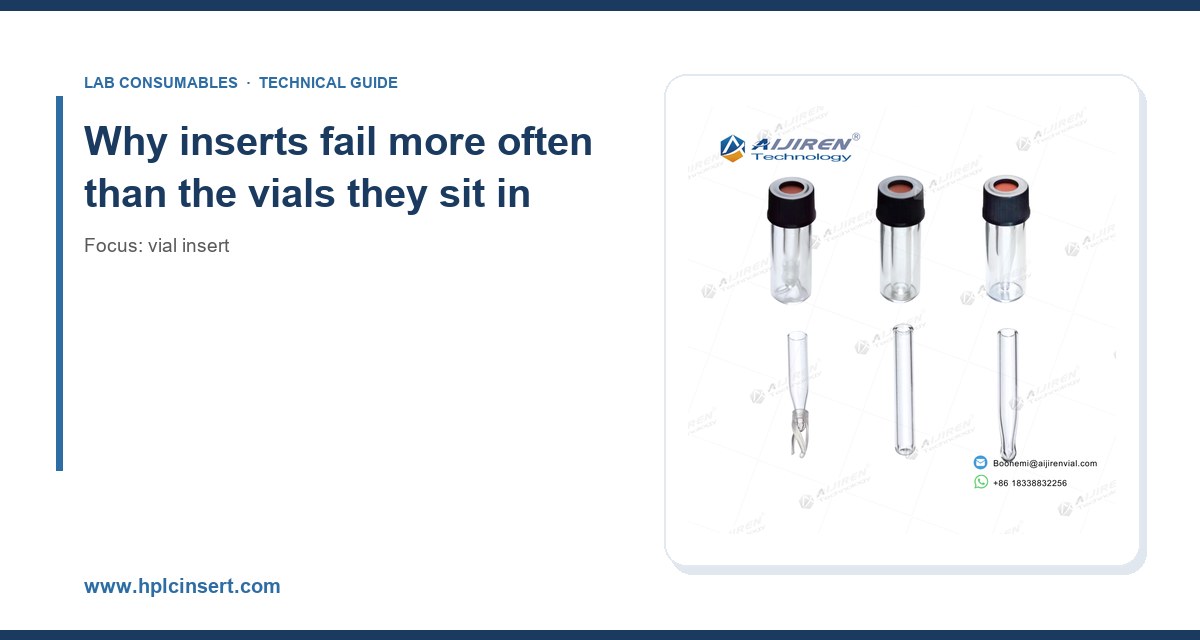
I have watched a lot of autosampler trays fail over the years, and the vial insert is almost always the quiet culprit. Not the column, not the mobile phase, not the detector lamp. The little glass cone that holds the last 150 microliters of your sample. When it goes wrong, you usually find out three days later when someone asks why the low-concentration calibration points drift and the injection volume looks fine on the method printout. This article is the field guide I wish I had handed to every new analyst: the failures I have personally debugged, what causes them, and the numbers that keep them from happening.
A standard 2mL vial has a lot of margin. The ID is roughly 12 mm at the widest point, the glass is 1.0 to 1.2 mm thick, and the crimp or screw thread has decades of tooling behind it. An insert has almost no margin. A typical 150 µL pulled-point insert has an outer diameter around 5.0 to 6.0 mm, a wall thickness of 0.4 to 0.6 mm, and a tapered tip that has to position itself within a fraction of a millimeter of the needle path. The needle has to reach the bottom without touching glass, the sample has to stay in the cone without wicking up the wall, and the insert has to stay put when the tray indexes 2 mm to the next position.
Every one of those constraints has a failure mode. The rest of this article walks through the ones that actually show up in daily operation, in rough order of how often I see them.
Failure 1: needle strikes and bent syringe barrels
What it looks like
The autosampler throws a “needle error” or “sample not detected” flag, or worse, the run continues and you get a partial injection. Pull the syringe and the needle is bent 5 to 15 degrees off axis. Sometimes the septum is punched through at an angle. Occasionally the insert is cracked at the shoulder and glass shards are sitting in the vial.
Root causes
- Insert height mismatch. A 150 µL insert designed for a 32 x 11.6 mm vial sits at a specific depth. Drop a 250 µL insert with a longer body into the same vial and the top sits 1 to 2 mm too high. The needle guide on the autosampler assumes a fixed top-of-insert position. That extra millimeter is enough to bend a 23-gauge needle at the first injection.
- Incorrect needle depth in the method. Many methods are written with a bottom-of-vial offset of 2 mm. With a conical insert, the needle tip has to stop 1 to 2 mm above the physical cone tip or it will scrape the inside of the taper. On a 150 µL insert with a 6 mm cone, the usable draw depth is often only 3 to 4 mm above the tip.
- Insert not seated. If the insert is sitting at an angle because the vial lip has a glass burr or a plastic flash line, the top of the insert is 0.5 to 1 mm off center. The needle guide does not know that.
Prevention
Use the insert and vial as a matched set from the same supplier. Do not mix a 150 µL insert from one vendor with a 2 mL vial from another unless you have measured both. Check needle depth every time you change insert format. A simple depth gauge (a 0.5 mm step gauge is fine) on the autosampler needle before the first run saves more time than it costs. I keep a laminated card taped to each autosampler with the correct insert, the correct needle depth, and the correct vial torque.
Failure 2: sample loss and wicking in the cone
What it looks like
The low calibration point gives 70 to 85 percent of the expected peak area, and the RSD across six injections is 4 to 8 percent. The high points are fine. You check the standard prep, the pipette, the volumetric flask. Nothing is wrong. The insert is losing sample.
Root causes
- Hydrophobic wicking. Silanized glass inserts (the ones treated with a silane to reduce surface activity) can actually make aqueous samples bead up and sit on the wall of the cone rather than in the tip. If the needle draws from the tip, it misses the bead. This is worse with samples containing more than 20 percent organic modifier, because the wetting behavior flips.
- Conical tip geometry. A sharp 30-degree cone holds less residual volume than a blunt 60-degree cone, but the sharp cone is also easier for the needle to miss if the insert shifts. A 45-degree taper is the practical compromise for most 150 to 250 µL inserts.
- Evaporation. A pulled-point insert with a 5 mm opening loses 3 to 6 percent of a 150 µL aqueous sample in 8 hours at 10 °C tray temperature. Volatile analytes (methanol, acetonitrile, ethyl acetate) lose 15 to 25 percent in the same window. That is not a sample prep problem. That is the insert.
Prevention
For aqueous samples, use unsilanized borosilicate inserts. For samples with more than 30 percent organic content, use silanized glass or a polymer insert. Match the insert to the sample chemistry, not to the catalog page. If you run overnight sequences with volatile analytes, cap the tray with a septum mat and hold the tray at 4 to 10 °C. A 150 µL insert with a 6 mm opening loses about 4 percent in 8 hours at 10 °C with a septum mat, versus 15 to 20 percent without.
Failure 3: insert falls out of the vial
What it looks like
The autosampler picks up a vial, the insert drops to the bottom of the vial, and the needle either misses the sample or hits the insert body. Sometimes the insert falls out during transport and you find it rolling around in the tray.
Root causes
- Wrong insert diameter. A 5.0 mm insert in a vial with a 6.0 mm neck ID drops straight through. A 6.0 mm insert in a vial with a 5.6 mm neck ID will not seat at all and sits proud.
- Missing or incorrect spring. Some insert designs use a small polymer spring or a flared shoulder to hold position. If the spring is missing or compressed from repeated autoclaving, the insert falls.
- Crimp cap over-torque. Crimping at more than about 2.0 inch-pounds (0.23 N·m) on an 11 mm aluminum seal deforms the vial lip and can push the insert down. The correct crimp for an 11 mm standard is 1.5 to 1.8 inch-pounds, applied with a calibrated crimper. Hand crimpers that have not been checked in a year are the biggest source of this problem.
Prevention
Measure the neck ID of the vial lot with a pin gauge before you commit to an insert size. Keep a calibrated crimper on each bench and check it monthly against a torque standard. If you use screw caps, hand-tight plus a quarter turn is the practical limit for most 9 mm thread finishes; more than that starts to crush the PTFE-lined silicone septum and can push the insert off center.
Failure 4: septum coring and needle clogging
What it looks like
After 80 to 150 injections, the needle starts to clog. Backpressure on the syringe goes up, the injection volume drops, and eventually the autosampler errors out. You pull the needle and find a small plug of silicone or PTFE in the bore.
Root causes
- Septum durometer too soft. A 45 Shore A silicone septum cores more easily than a 55 Shore A septum. The softer material is easier to pierce but sheds more particles.
- Needle gauge too large for the septum. A 22-gauge needle (0.72 mm OD) cores a 9 mm septum faster than a 23-gauge needle (0.64 mm OD). If your method allows, drop one gauge.
- Repeated piercing in the same spot. A fixed-position autosampler that pierces the same point 200 times will core the septum every time. Rotating the piercing position across the tray helps, but only if the autosampler supports it.
Prevention
Use pre-slit septa for methods with more than 100 injections per vial. Replace the septum every 100 to 150 injections, not every 500. A 55 Shore A silicone/PTFE septum with a 1.0 mm pre-slit will typically give 150 to 250 clean punctures before coring starts, versus 60 to 100 for an unslit 45 Shore A septum. This is one of the few places where paying 30 percent more for the septum saves you a full day of troubleshooting.
Failure 5: contamination from reusable inserts
What it looks like
Blank injections show carryover peaks at 0.5 to 2 percent of the previous sample. The peaks are reproducible and disappear if you switch to a fresh insert. The method has no obvious carryover source.
Root causes
- Insufficient rinse between uses. A 150 µL insert holds a residual film of 1 to 3 µL after a single water rinse. If the previous sample was a 1 mg/mL standard, that film is 1 to 3 µg of analyte sitting in the cone.
- Surface adsorption. Basic compounds (amines, quaternary ammoniums) adsorb to the silanol groups on untreated borosilicate glass. A single water rinse does not remove them. You need a methanol rinse followed by a water rinse, and even then some compounds persist.
- Insert reuse past the point of no return. Glass inserts are not designed for indefinite reuse. After 10 to 15 cleaning cycles, the surface starts to pit and hold sample more aggressively.
Prevention
Treat inserts as consumables, not labware. If you must reuse, limit to 10 cycles and use a validated cleaning protocol: methanol rinse, water rinse, 10 percent nitric acid soak for 30 minutes, water rinse, dry at 60 °C. For basic compounds, use silanized inserts or move to a polymer insert. I have seen labs save $400 a year on inserts and lose $4,000 in rework. Do the math before you reuse.
Failure 6: insert cracking under thermal stress
What it looks like
An insert cracks at the shoulder or the tip after a temperature cycle. Sometimes it cracks in the tray, sometimes in the autosampler, sometimes in the fridge. Glass shards end up in the vial and the needle picks up a fragment.
Root causes
- Thermal shock. Borosilicate glass (Type I, expansion coefficient around 3.3 x 10⁻⁶ per °C) handles a 120 °C step change without cracking. Soda-lime glass (Type III, around 9.0 x 10⁻⁶ per °C) does not. A cheap insert that looks identical to a Type I insert can be Type III. Freeze a sample at -20 °C and drop it into a 25 °C autosampler tray and the Type III insert will often crack.
- Mechanical stress from the cap. An over-torqued crimp cap puts a point load on the insert shoulder. Add a thermal cycle and the crack propagates from that point.
- Autoclave cycles. If inserts are being sterilized (rare, but it happens in bioburden-sensitive labs), a 121 °C autoclave cycle followed by a rapid cool-down will crack Type III inserts.
Prevention
Specify Type I borosilicate glass in your insert purchase spec. It costs 15 to 25 percent more and eliminates this failure mode. If you freeze samples, thaw them in a 4 °C fridge overnight before loading the tray. Do not autoclave inserts unless the manufacturer explicitly rates them for it.
Failure 7: incompatible insert and vial combinations
What it looks like
Everything looks fine on the bench, but the run fails. The insert sits at the wrong depth, the cap does not seal, or the autosampler gripper cannot pick up the vial because the insert is 1 mm proud of the vial lip.
Root causes
- Mixing vendors. A 2 mL vial from one supplier and a 150 µL insert from another may not be dimensionally compatible. The neck ID tolerance on a cheap vial can be ±0.3 mm, which is enough to change the insert seating depth.
- Wrong insert format for the autosampler. Some autosamplers (the Agilent 7693A, for example) have specific gripper geometry that requires the insert to sit below the vial lip. Others (some CTC PAL configurations) tolerate a slightly proud insert. Check the autosampler manual before you buy.
- Wrong cap for the insert. A 9 mm screw cap with a 1.0 mm septum works with most inserts. A 9 mm cap with a 3.0 mm septum can push the insert down into the vial.
Prevention
Buy the vial, insert, and cap as a matched set. If you must mix, measure the critical dimensions (neck ID, insert OD, insert height, cap septum thickness) with calipers on a sample of 10 from each lot. The vial insert page on our site has a compatibility matrix that covers the common autosampler formats.
Failure 8: sample loss from insert overfill
What it looks like
The analyst fills the insert to the top, caps the vial, and the sample wicks into the cap or spills into the vial annulus. The injection volume is short, or the sample is contaminated by whatever was in the vial annulus.
Root causes
- Overfilling. A 150 µL insert holds about 150 µL at the very top of the cone, but the practical fill is 100 to 120 µL. Fill to 80 percent of nominal capacity and you avoid wicking entirely.
- No headspace. A capped insert with no headspace builds pressure when the tray warms from 4 °C to 25 °C. The pressure pushes sample past the cap septum.
- Wrong pipette tip. A 200 µL pipette tip that is 1 mm too wide will not fit into a 5 mm insert opening. The analyst dispenses into the vial instead and the insert stays empty.
Prevention
Use gel-loading pipette tips (0.5 to 1.0 mm OD at the tip) for inserts with a 5 mm opening. Fill to 80 percent of nominal capacity. Leave at least 2 mm of headspace below the cap. If you are filling more than 50 inserts per batch, use a repeater pipette with a long narrow tip rather than a single-channel pipette.
A troubleshooting checklist you can tape to the bench
When an insert-related problem shows up, work through this list in order. Each item takes less than five minutes and most problems are found in the first three.
- Check insert seating. Insert top should sit 0.5 to 1.0 mm below the vial lip for most autosamplers. If it is proud, the insert is the wrong size or the vial neck has a burr.
- Check needle depth. Needle tip should stop 1 to 2 mm above the physical cone tip. Verify with a step gauge before the first injection of the day.
- Check fill volume. Fill should be 80 percent of nominal capacity, with at least 2 mm of headspace below the cap.
- Check septum condition. Replace after 100 to 150 punctures. If the septum shows a visible tear or a plug is missing, replace immediately.
- Check cap torque. Crimp at 1.5 to 1.8 inch-pounds. Screw caps hand-tight plus a quarter turn.
- Check insert glass type. Type I borosilicate only if the sample will see a temperature cycle of more than 40 °C.
- Check for wicking. Look at the cone under a magnifier. If sample is sitting on the wall rather than in the tip, the insert surface chemistry is wrong for the sample.
- Check carryover. Run a blank after a high standard. If carryover is above 0.1 percent, the insert is either dirty or the wrong surface chemistry.
Selection criteria: how to choose the right insert for your method
The table below is the decision checklist I use when specifying inserts for a new method. The numbers are the ones that matter in practice.
- Capacity: 150 µL for methods with 10 to 50 µL injections; 250 µL for methods with 50 to 100 µL injections; 400 µL for methods with more than 100 µL injections. Do not use a 400 µL insert for a 10 µL injection; the residual volume in the cone is too large relative to the draw.
- Glass type: Type I borosilicate for any method with a temperature cycle; Type I or Type III for room-temperature methods. Type III is acceptable only if the sample never sees a temperature step larger than 40 °C.
- Surface treatment: Unsilanized for aqueous samples; silanized for samples with more than 30 percent organic content; polymer for basic compounds or samples with a pH above 9.
- Cone geometry: 45-degree taper for most methods; 30-degree taper only if the method needs the last 20 µL of a 150 µL fill; 60-degree taper for viscous samples.
- Opening diameter: 5 mm for standard 22 to 23 gauge needles; 6 mm for 20 to 21 gauge needles or for methods that need to pipette directly into the insert.
- Height: Match to the vial format. A 32 x 11.6 mm vial takes a 150 µL insert with a body height of 30 to 31 mm. A 32 x 12 mm vial takes a 31 to 32 mm insert. Measure the vial, then buy the insert.
- Compatibility: Check the autosampler manual for insert height and gripper clearance. Agilent, Thermo, and CTC PAL all have slightly different requirements.
For a deeper reference on the standards that govern vial and insert dimensions, the U.S. EPA SW-846 test methods document the sample handling requirements for environmental methods, and the Restek technical resources library has useful application notes on insert selection for specific compound classes.
Operating precautions that prevent most failures
Storage and handling
Store inserts in the original packaging, upright, in a dust-free cabinet. Borosilicate inserts that sit loose in a drawer pick up glass dust and paper fibers that show up as baseline noise on a fluorescence detector. If you transfer inserts to a bench tray, line the tray with lint-free wipes and cover it when not in use.
Temperature control
Autosampler trays that run at 4 to 10 °C are the single biggest source of condensation-related failures. A cold insert pulled into a warm room condenses water on the outside, which then drips into the vial annulus. Keep the tray closed, use a septum mat, and let inserts equilibrate to room temperature before you open the tray at the end of a run.
Torque and crimping
Every crimper on every bench should be checked monthly against a torque standard. A crimper that has drifted to 2.5 inch-pounds will deform the vial lip, push the insert down, and crack the shoulder on the next thermal cycle. This is a 10-minute monthly task that eliminates a whole class of failures.
Lot-to-lot consistency
Buy inserts from a supplier who publishes dimensional tolerances. The ones that matter are insert OD (±0.1 mm), insert height (±0.2 mm), cone angle (±2 degrees), and glass type. If the supplier cannot give you those numbers, find another supplier. The HPLC consumables catalog on our site lists the tolerances for each insert format we stock.
When to replace inserts and when to replace the whole system
Inserts are consumables. Replace them when any of the following is true:
- Visible crack, chip, or scratch on the cone or shoulder.
- More than 10 cleaning cycles for a reusable insert.
- Carryover above 0.1 percent after a validated cleaning protocol.
- Visible wicking on the cone wall that does not resolve with a fresh insert from a different lot.
- Any insert that has been through a thermal cycle of more than 60 °C in a single step, regardless of glass type.
If you are replacing more than 20 percent of your inserts per month, the problem is not the insert. It is the vial, the cap, the crimper, or the autosampler. Check the crimper first, then the vial lot, then the autosampler needle alignment. A chromatography supplier who knows your method should be able to help you diagnose the pattern. If they cannot, they are not the right supplier.
What I recommend
For most labs running reverse-phase HPLC with 10 to 50 µL injections, the right specification is a 150 µL Type I borosilicate insert, 5 mm opening, 45-degree cone, unsilanized, matched to a 32 x 11.6 mm vial, with a 9 mm screw cap and a 1.0 mm pre-slit 55 Shore A silicone/PTFE septum. Crimp at 1.5 to 1.8 inch-pounds if you use aluminum seals. Fill to 100 to 120 µL. Replace the septum every 100 to 150 injections. Replace the insert every 10 cleaning cycles or at the first sign of wicking.
For methods with more than 30 percent organic content, swap to a silanized insert. For basic compounds, swap to a polymer insert. For methods with more than 100 µL injections, move to a 250 µL insert and reduce the fill volume to 200 µL. For environmental methods under SW-846, follow the method-specific sample handling requirements and use a Type I insert with a 6 mm opening so the pipette tip fits without wicking.
If you are specifying a new method, buy a small sample of three insert formats (150 µL, 250 µL, and 400 µL) and run a carryover and RSD study on each with your actual sample matrix. The data will tell you which one to standardize on faster than any catalog page. Agilent and Thermo Fisher both publish autosampler-specific insert compatibility tables, and those are worth reading before you commit to a format.
Takeaway
Vial insert failures are almost never mysterious. They come from four things: wrong dimensions, wrong surface chemistry, wrong torque, and wrong replacement interval. Get those four right and the insert stops being a troubleshooting topic. Measure the vial before you buy the insert, specify Type I borosilicate, match the surface treatment to the sample, calibrate the crimper monthly, and replace the septum on a schedule instead of on a hunch. The rest is sample prep, and that is a different article.
References & further reading
Related resources from our lab consumables network:
- Vial Insert at hplcinsert.com
- 2Ml Vial at 2mlsamplevial.com
- Hplc Consumables at hplcconsumable.com
- Chromatography Supplier at chromatographysupplier.com
External references and standards: