

I have watched a lab buy 20,000 glass inserts on price alone and then spend three weeks chasing a ghost peak that turned out to be silicone oil from the septa on the cheap caps they bundled with them. The inserts were fine. The lesson cost them a method revalidation. Choosing a vial insert is not a commodity purchase, even though the part costs less than a cup of coffee. It sits at the exact point where your sample meets your autosampler, and every dimension, surface, and material choice has a downstream consequence in your chromatogram.
This guide is what I wish someone had handed me fifteen years ago. It covers the geometry that actually matters, the polymer choices, the failure modes I have personally debugged, and a decision framework you can take into a vendor negotiation. If you are standardizing inserts across multiple sites, the numbers here should survive a procurement review and an audit.
A vial insert is a small glass or plastic cup that sits inside a standard sample vial, usually a 2ml vial, to reduce the dead volume at the bottom. The autosampler needle has a fixed travel depth. Without an insert, a 100 µL sample in a 2 mL vial pools in a film across the bottom, and the needle either misses it or aspirates air. With a conical insert, the same 100 µL collects in a narrow tip that the needle can reach reliably.
The physics is simple. A 2 mL vial has an internal diameter around 12 mm. A 100 µL pool spread across that floor is roughly 1 mm deep and very wide, so surface tension and meniscus position make the needle depth unpredictable. A conical insert with a 6 mm top ID and a tip that tapers to 1.5 mm forces the liquid into a column the needle can find every time. That is the whole point: reproducible aspiration, not storage.
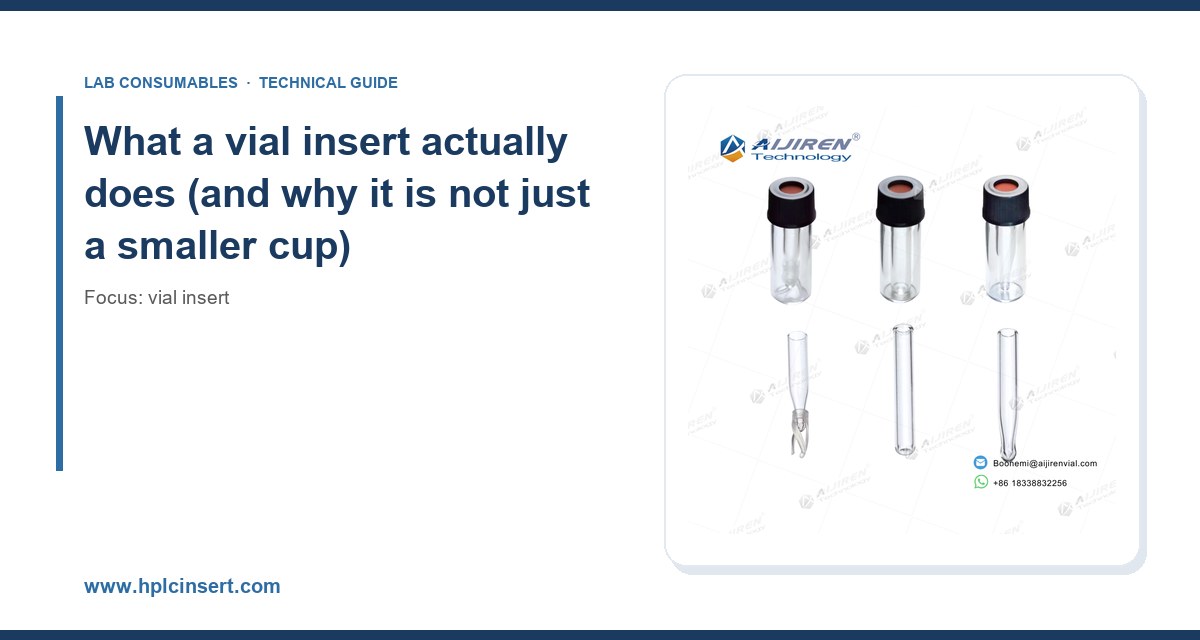
Inserts come in three broad geometries. Conical inserts taper to a point and suit small volumes down to about 50 µL. Flat-bottom inserts hold more volume and are easier to pipette from but waste the last 20 to 30 µL. Pulled-point or “shell” inserts have a very fine tip, often 1 mm or less, and are the choice when you are down to 20 or 30 µL and every microliter counts. The wrong geometry is the single most common reason a lab reports “the autosampler is missing samples” when the autosampler is doing exactly what it was told.
Material selection: glass versus plastic, and which glass
Type I borosilicate glass
For anything going near an HPLC or GC inlet, use Type I borosilicate glass (often written as 33 expansion, USP Type I). It has low alkali leaching, good chemical resistance, and it does not adsorb most small molecules the way plastics can. Hydrolytic class matters: a Type III soda-lime insert can leach sodium and calcium into aqueous mobile phases, and you will see it as baseline drift or as sodium adducts in LC-MS. I have seen a pH 9 buffer sit in cheap inserts overnight and come back with a visible etch ring at the meniscus.
For LC-MS work, some suppliers offer silanized or deactivated glass. Deactivation reduces silanol activity that can adsorb basic analytes. If you are running low-level amines or quaternary ammonium compounds, pay for it. For neutral analytes and most reversed-phase work, plain Type I glass is fine.
Polypropylene and other plastics
Plastic inserts are cheaper and survive drops that shatter glass. Polypropylene is the usual choice. It is fine for many aqueous and alcoholic samples, but it is not inert. Polypropylene can leach oligomers and antioxidants, and it adsorbs hydrophobic compounds more than glass does. For trace analysis at the low ng/mL level, I default to glass. For high-throughput screening where the insert is discarded after one run and the analytes are at µg/mL, polypropylene is a reasonable cost trade.
One more material note: avoid inserts with colored or printed exteriors if you are doing fluorescence or UV work at short wavelengths. The dye can fluoresce. Clear, unmarked glass is boring and correct.
The dimensional specifications that decide whether it fits
Inserts are not interchangeable across vial brands, even when both claim “2 mL, 12 x 32 mm.” The critical dimensions are:
- Outer diameter (OD): typically 5.0 to 6.0 mm for conical inserts that fit standard 12 x 32 mm vials. An insert wider than the vial’s internal shoulder will not seat and will sit proud, changing needle depth.
- Height: usually 29 to 31 mm for a full-height insert, or about 15 mm for a “short” insert used with a spring-loaded or bottom-sensing autosampler. Match the height to the vial, not the other way round.
- Tip geometry: pulled-point tips as fine as 1.0 mm ID versus standard conical tips around 1.5 to 2.0 mm. Finer tips hold smaller dead volumes but are harder to fill and easier to clog with precipitate.
- Capacity: a typical 5 mm OD conical insert holds 150 to 250 µL; a pulled-point insert holds 100 to 150 µL; a flat-bottom insert can hold 300 µL or more.
Get the OD and height wrong and the insert either floats, tilts, or sits too high. A tilted insert is a silent failure: the needle hits the glass wall, bends slightly, and after a few hundred injections you get a coring or a bent needle that ruins a run. I check fit by dropping a dry insert into a dry vial and inverting it. If it rattles or falls out, the OD is undersized for that vial lot.
The cap and septum are part of the system
You cannot specify an insert without specifying the closure. The standard is a 9 mm screw thread or an 11 mm crimp, and the septum material drives more failures than the insert ever will. Silicone septa are soft and reseal well but can bleed siloxanes into GC-MS. PTFE-faced silicone is the general-purpose choice. For repeated injections through the same septum, budget for fewer than 10 punctures on a standard silicone septum before coring becomes a risk; some premium septa are rated higher, but I do not trust any septum past about 8 to 10 needle entries without inspecting it.
Crimp caps need the right crimping force. Overtighten and you crack the vial neck or deform the septum; undertighten and you lose the seal and the sample evaporates. A properly set crimper produces a uniform, even crimp around the aluminum seal. If you are running a long autosampler sequence, a loose crimp on sample 40 will show up as a concentration drift you will blame on the instrument.
Matching the insert to your autosampler
Autosamplers differ in how they find the liquid. Some use a fixed needle depth set in software. Some use a bottom-sensing or pressure-sensing needle that stops when it touches liquid or glass. The two demand different inserts.
For a fixed-depth autosampler, you want a conical insert whose tip sits at a known, repeatable height, and you set the needle depth to land a millimeter or two above the tip. For a bottom-sensing instrument, a pulled-point insert with a fine tip gives you the lowest possible residual volume, but the sensing algorithm can trip on the glass if the insert is not seated flat. I have seen bottom-sensing needles repeatedly “fail to find liquid” because a batch of inserts was 0.3 mm too tall and the needle was hitting the insert wall, not the sample.
Check the manufacturer’s stated needle depth and insert compatibility. Agilent publishes detailed autosampler and consumable compatibility data for its chromatography consumables and columns, and Thermo Fisher documents sample handling configurations across its chromatography and sample handling platforms. Read those tables before you standardize. A generic insert that “fits 2 mL vials” may fit the vial and still miss the needle.
Volume, dead volume, and the numbers that matter
The reason to use an insert at all is to recover a small sample. The number that governs recovery is the residual or dead volume, the liquid left behind after the needle has taken what it can. For a good conical insert, residual volume is typically 5 to 15 µL. For a pulled-point insert, it can drop to 2 to 5 µL. For a flat-bottom insert, expect 20 to 40 µL.
Plan your fill volume with headroom. If you have 100 µL of sample and a conical insert with a 150 µL capacity, you are at two-thirds full, which is comfortable. If you have 200 µL and a 150 µL insert, you will overfill and the excess spills into the vial, defeating the purpose. A simple rule: fill to no more than about 70 to 80 percent of insert capacity so the meniscus stays inside the conical section and the needle can reach it.
Evaporation is the other volume risk. A small fill volume in a loosely capped vial loses solvent fast, especially with volatile solvents like dichloromethane or pentane. If your autosampler tray sits at ambient for a long sequence, use a properly crimped or screwed cap, keep the tray cool if the instrument allows it, and do not leave a 50 µL sample in an open insert for six hours. I have measured more than 20 percent loss of a volatile solvent from a poorly sealed vial over a long run, which is enough to shift a peak area by a similar margin.
Chemical compatibility and temperature limits
Glass handles almost everything you will put in it: acids, bases, most organic solvents, and aqueous buffers across the normal pH range. The weak points are hydrofluoric acid and hot concentrated alkali, which will etch glass. If your method uses strong base at elevated temperature, plastic may actually be the safer insert, provided the analyte does not adsorb to it.
Temperature matters for two reasons. First, thermal expansion: a tightly fitted insert in a vial that is heated can bind or crack. Second, septum performance. Standard silicone septa are rated to roughly 200 °C; PTFE-faced septa go higher. If you are doing headspace or heated sample prep, confirm the septum and cap ratings, not just the insert. Most inserts themselves are rated well above any autosampler tray temperature, so the closure is usually the limiting part.
For light-sensitive analytes, amber glass inserts exist and are worth the small premium. Clear inserts in a clear vial on a lit bench will photodegrade some compounds within an hour.
A buyer’s decision checklist with concrete numbers
Here is the checklist I use when qualifying a new insert for a method. Treat it as a gate: if any line fails, do not standardize on that part.
- Geometry: OD 5.0 to 6.0 mm, height matched to vial (about 29 to 31 mm full height or 15 mm short), tip ID matched to your minimum volume (1.0 mm pulled point for sub-50 µL, 1.5 to 2.0 mm conical for 100 µL and up).
- Material: Type I borosilicate glass for trace or LC-MS work; polypropylene only where adsorption and leaching are proven acceptable.
- Capacity vs fill: fill volume no more than 70 to 80 percent of insert capacity; residual volume within your recovery target (5 to 15 µL conical, 2 to 5 µL pulled point).
- Closure: 9 mm screw or 11 mm crimp matched to your vial; septum rated for your temperature and puncture count (assume under 10 punctures for standard silicone).
- Autosampler fit: needle depth verified against the manufacturer’s compatibility table; insert seats flat with no tilt.
- Certification: certificate of analysis for glass type and dimensions; lot-to-lot dimensional tolerance stated in writing (aim for ±0.1 mm on OD and height).
- Chemical and thermal: compatibility confirmed for your solvent and pH; septum and cap rated for your maximum temperature.
Run this checklist against two or three candidate parts and you will usually find one clear winner. The cheapest insert rarely passes all seven lines, and the most expensive one is not automatically the best. The right answer is the part that passes every gate at the lowest total cost, including the cost of a failed run.
Operational precautions that prevent most failures
Most insert problems are handling problems, not manufacturing problems. A few habits eliminate the majority of them.
- Never reuse an insert across methods or samples unless you have validated a cleaning procedure. Cross-contamination from a previous sample is easy to miss and hard to trace.
- Inspect for cracks and chips before loading. A hairline crack at the tip will leak sample into the vial and give you a low recovery that looks like an injection problem.
- Fill with a pipette, not a pour. A steady hand and a calibrated pipette keep the meniscus where the needle expects it.
- Seat the insert fully and confirm it does not wobble. A tilted insert changes needle depth by a millimeter or more.
- Cap with consistent torque. Screw caps should be snug, not gorilla-tight. Crimp caps need a properly adjusted crimper; check a few crimps by eye for an even seal.
- Mind the tray environment. Cool the tray for volatile solvents and keep light-sensitive samples in amber glass.
- Log the lot number. When a mystery peak appears, the first question is always “did anything change?” A lot number on the bench sheet answers it in seconds.
If you are sourcing inserts alongside vials, caps, and syringes, buy them as a matched system from one HPLC consumables supplier rather than mixing brands. Mixed lots are where dimensional drift creeps in.
Troubleshooting checklist: symptom to cause
When an insert-related problem shows up, work through this list before you touch the instrument.
- Low or variable peak area: needle missing the liquid (wrong insert height or depth), insert tilted, or fill volume below the needle’s reach. Check seating and depth first.
- Ghost peaks or rising baseline: septum bleed or insert leaching. Swap to PTFE-faced septa and Type I glass, and run a blank.
- Needle bending or coring: insert sitting proud, tip too fine for the needle gauge, or a bent needle from a previous tilted insert. Inspect inserts and needles together.
- Sample loss over a long sequence: poor cap seal or volatile solvent in a warm tray. Check crimp quality and tray temperature.
- Precipitate or clogged tip: sample matrix crashing out in a fine pulled-point tip. Move to a wider conical tip or filter the sample.
- Adduct peaks in LC-MS: sodium or calcium leaching from soda-lime glass. Switch to Type I borosilicate and confirm with a certificate of analysis.
For method-level context on sample preparation and holding times, the U.S. EPA SW-846 test methods are a useful reference for how long samples can be held and what container and preservation requirements apply. Restek’s technical resources for chromatography are also worth bookmarking for inlet and sample handling guidance that applies across instruments.
Cost, sourcing, and the total-cost view
Inserts are cheap per unit, so the temptation is to buy on price. Resist it. The real cost of a bad insert is the cost of the run it ruins: instrument time, analyst time, re-preparation, and sometimes a revalidation. A single failed 96-well sequence can cost more than a year’s supply of good inserts.
Buy from a chromatography supplier who will give you a certificate of analysis with dimensional tolerances and glass type, and who stocks consistently from the same production line. Ask for the lot-to-lot tolerance in writing. A supplier who cannot state ±0.1 mm on OD and height is telling you something. Standardize on one part number, one vial insert specification, and one closure, and put the lot number on every bench sheet. That is how you turn a commodity purchase into a controlled one.
Takeaway
Choose the insert by geometry first, material second, and price last. Match the OD (5.0 to 6.0 mm) and height (about 29 to 31 mm, or 15 mm short) to your vial, pick a tip that reaches your smallest volume (1.0 mm pulled point below 50 µL, 1.5 to 2.0 mm conical above), fill to 70 to 80 percent of capacity, and pair it with a closure rated for your temperature and puncture count. Verify autosampler compatibility against the manufacturer’s table, demand a certificate of analysis with ±0.1 mm tolerances, and log the lot number. Do those things and the insert stops being a variable in your method. Skip them and it becomes the one part you never suspect until it has already cost you a week.
References & further reading
Related resources from our lab consumables network:
- Vial Insert at hplcinsert.com
- 2Ml Vial at 2mlsamplevial.com
- Hplc Consumables at hplcconsumable.com
- Chromatography Supplier at chromatographysupplier.com
External references and standards: