

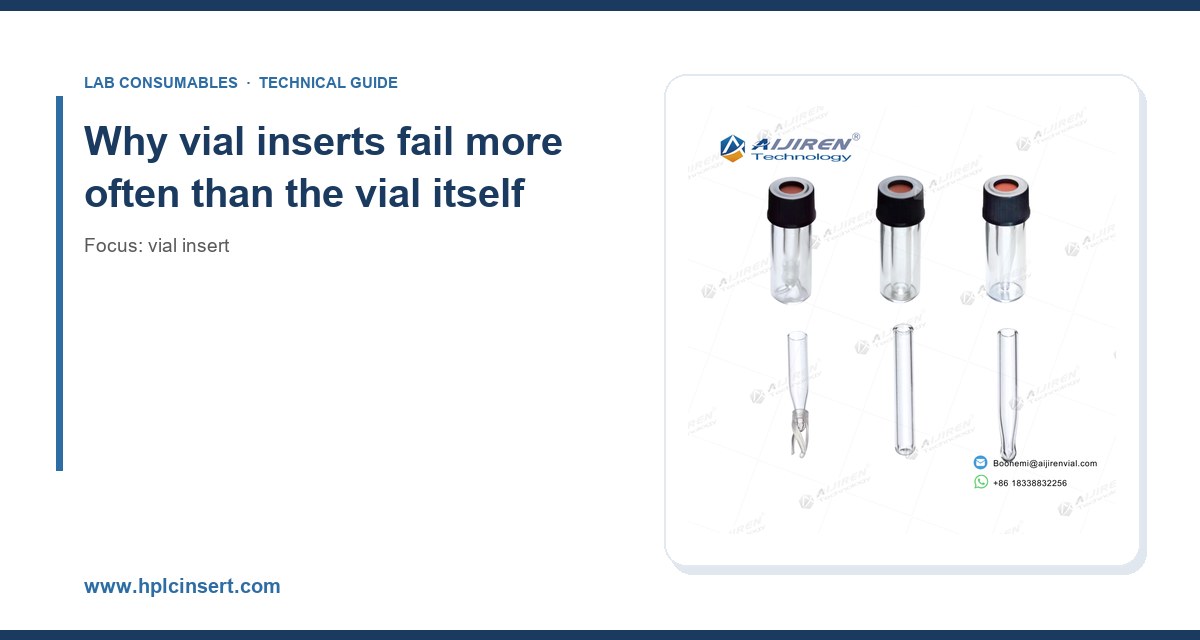
Three times in the past year I have watched a lab chase a “column problem” that turned out to be a 150 µL insert sitting 0.4 mm too high in a 2 mL vial. The autosampler drew air, the peak area dropped 30 percent, and the analyst spent two days re-equilibrating a perfectly good C18 column. Insert failures are cheap to prevent and expensive to miss. This article collects the failure modes I have seen most often in the field, the root causes behind each, and the specific numbers and checks that keep them from recurring.
A vial insert is a small, low-cost part doing a precise mechanical job. It has to sit concentric inside a 2 mL vial, present a liquid column of roughly 6 to 8 mm at the bottom, and let a needle of 0.5 to 0.7 mm outer diameter (OD) reach the last 20 µL without bending. That is a lot of tolerance to hold in a molded polypropylene cone that costs a few cents. When it works, nobody notices. When it fails, the symptom usually shows up as a chromatography problem, not an insert problem, and that is what makes diagnosis slow.
The inserts used in most regulated labs fall into three families: pulled-glass with a polymer foot, molded polypropylene, and glass-insert-in-glass (sometimes called a shell vial). Each has a distinct failure profile. I will go through the common failures in the order they tend to appear in a lab’s life: first-week problems from mis-seating, then needle damage, then carryover, then sample loss and evaporation, then the slow drift that nobody catches until an audit.
Failure 1: the insert floats or sits high in the vial
This is the single most common problem I get called about. The autosampler reports a short injection, or the peak area is low and variable, and the analyst finds the insert has ridden up the vial wall by a millimeter or two.
Root cause
Most inserts rely on a friction fit or a small polymer foot that rests on the vial’s internal shoulder. If the insert is the wrong length for the vial, if the vial’s internal shoulder height varies between mold lots, or if the insert is inserted at an angle, it will not seat fully. I have also seen this happen when a lab mixes inserts from one vendor with vials from another: a 31 mm insert designed for a 32 x 11.6 mm vial will sit 0.5 to 1 mm high in a vial with a slightly shallower shoulder. The GPI 13-425 thread is standardized, but the internal shoulder geometry is not.
How to check
- Drop a clean insert into a clean vial and look at it against a bright light. The top rim of the insert should sit at least 2 mm below the vial’s crimp or thread base.
- Measure the insert OD against the vial ID with calipers. For a standard 2 mL vial with 12 mm ID, a 6 mm OD insert should have 2.5 to 3 mm of clearance on each side.
- Fill a test vial with water to the insert’s nominal capacity and confirm the liquid level is 1 to 2 mm above the needle’s lowest programmed position.
Prevention
Buy inserts and vials as a matched pair from one source. If you must mix, run a 20-vial seating check on each new lot. A simple jig made from a drilled aluminum block holds the vial vertical while you press the insert home with a blunt probe. Never seat an insert by pushing on the glass rim with a metal tool; use a plastic-tipped probe or the manufacturer’s seating tool.
Failure 2: bent or blunted autosampler needles
A needle that bends once is a $40 to $200 replacement. A needle that bends repeatedly is a sign the insert geometry is wrong for the sampler.
Root cause
Most autosamplers position the needle to a fixed depth below the vial cap. If the insert’s internal cone is too shallow, the needle hits the glass floor. If the cone is too narrow, the needle scrapes the side wall on the way down. Both bend the needle over a few hundred injections. The problem is worse with fixed-needle syringes, where the entire syringe has to be replaced, and better with removable-needle designs.
I have also seen needle damage from inserts with a molded polymer bottom that deforms under the needle’s downward force. Polypropylene creeps under sustained load, and a needle that rests on the bottom of a PP insert for a 10-minute run will slowly push through the floor.
How to check
- Set the needle depth to 1 mm above the insert floor and run 100 injections of water. Inspect the needle under a loupe. Any visible bend or burr means the depth is wrong or the insert cone is too shallow.
- Measure the insert’s internal depth with a depth gauge. A 150 µL insert should have an internal depth of at least 6 mm from the rim to the cone tip.
- Check the needle’s straightness by rolling it on a flat surface. A 0.5 mm needle should roll without visible wobble.
Prevention
Program the needle to stop 1 to 2 mm above the insert floor, not on it. For a 150 µL insert with a 6 mm internal depth, a stop depth of 4 to 5 mm below the rim is safe. Use a needle with a 0.5 mm OD and a 22-gauge bevel for viscous samples, and a 0.63 mm OD for aqueous samples. Replace needles every 5,000 to 10,000 injections, or sooner if you see a 5 percent RSD increase on a known standard.
Failure 3: carryover from a poorly rinsed insert
Carryover above 0.1 percent of the previous peak is a method failure in most regulated labs. Inserts are a common source because the internal cone traps liquid that the wash step does not reach.
Root cause
The needle wash in most autosamplers flushes the needle’s exterior and interior, but the insert’s cone is a dead volume. If the cone is too narrow (less than 1.5 mm at the tip), the wash solvent cannot displace the residual sample. The problem is worse with high-concentration samples (above 1 mg/mL) and with analytes that adsorb to glass or polypropylene.
How to check
Run a blank injection immediately after a high-concentration standard (10 mg/mL) and measure the carryover peak. If it is above 0.1 percent of the standard peak, the insert is a suspect. Swap in a new insert and repeat. If carryover drops below 0.05 percent, the insert is the cause.
Prevention
- Use an insert with a wide-mouth cone (at least 2 mm at the tip) for high-concentration samples.
- Add a wash step that dispenses 100 to 200 µL of wash solvent into the insert before the next injection.
- For analytes that adsorb to glass, use a silanized glass insert or a polypropylene insert with a low-binding surface treatment.
Failure 4: sample loss from evaporation
A 150 µL insert holding 100 µL of sample in a septum-capped vial will lose 5 to 15 percent of its volume over 24 hours in a 4 °C autosampler tray. That is enough to shift retention times and change peak areas on a run that spans a weekend.
Root cause
The insert’s small headspace and the septum’s permeability are the two variables. A thin silicone septum (0.9 mm) on a 13-425 cap is more permeable than a 1.5 mm PTFE-faced silicone septum. The insert’s narrow neck also concentrates the vapor, which increases the driving force for evaporation.
How to check
Weigh a filled, capped vial at time zero and again after 24 hours in the autosampler tray. A weight loss above 2 mg is a red flag. For a 100 µL aqueous sample, 2 mg is about 2 percent of the volume.
Prevention
- Use a 1.5 mm PTFE-faced silicone septum for volatile analytes.
- Cap the vial with a crimper set to the manufacturer’s recommended torque. For a 13-425 aluminum crimp cap, the target is 20 to 25 inch-pounds (2.3 to 2.8 N·m). Over-crimping deforms the septum and increases permeability.
- For runs longer than 12 hours, use a 300 µL insert with a wider neck, which has a lower surface-to-volume ratio.
Failure 5: insert contamination from the manufacturing lot
I have seen a single lot of glass inserts deliver a 0.5 to 2 ppb phthalate background that ruined a GC-MS method for plasticizers. The inserts were not cleaned after molding, and the residual mold release was the source.
Root cause
Glass inserts are typically molded or drawn and then annealed. If the annealing step is not followed by a solvent rinse and a high-temperature bake, residual organics remain on the surface. Polypropylene inserts can carry mold release agents and plasticizers from the resin.
How to check
Run a solvent blank through a new lot of inserts. For GC-MS, inject 1 µL of dichloromethane that has been stored in a new insert for 24 hours. A phthalate peak above 1 ppb means the lot is contaminated. For HPLC-UV, run a water blank at 210 nm and look for a baseline drift above 0.5 mAU.
Prevention
Buy inserts that are certified for low extractables, or pre-clean them yourself. A 30-minute soak in HPLC-grade methanol followed by a 2-hour bake at 200 °C removes most residual organics from glass. Polypropylene inserts cannot be baked above 120 °C without deformation, so pre-cleaning is limited to solvent rinses.
Failure 6: the wrong insert for the sample volume
A 150 µL insert holding 50 µL of sample has a liquid column of about 2 mm at the bottom of the cone. The needle cannot reach that volume without hitting the glass floor. The result is a short injection and a low peak area.
Root cause
The insert’s nominal capacity is not the same as its usable capacity. A 150 µL insert typically has a usable capacity of 100 to 120 µL, and a 300 µL insert has a usable capacity of 200 to 250 µL. The difference is the dead volume in the cone that the needle cannot reach.
How to check
Fill an insert to its nominal capacity with water and measure the volume the needle can actually withdraw. For a 150 µL insert, a 100 µL withdrawal should leave 20 to 30 µL in the cone. If the needle is drawing air, the sample volume is too low for the insert.
Prevention
Match the insert to the sample volume: use a 150 µL insert for 50 to 100 µL of sample, a 300 µL insert for 100 to 250 µL, and a 500 µL insert for 250 to 400 µL. For samples below 50 µL, use a 100 µL insert or a conical vial designed for small volumes.
Failure 7: insert collapse under centrifugation
Some labs centrifuge vials with inserts in place to pellet precipitate. A 6 mm OD glass insert with a 0.4 mm wall will crack at 3,000 x g if the vial is not supported in a swing-bucket rotor.
Root cause
Glass inserts are not designed for centrifugation. The wall thickness is too thin to resist the radial load, and the insert’s foot can shear off at the vial shoulder.
How to check
Inspect inserts after centrifugation for cracks at the cone or a detached foot. A 10x loupe is enough to see the damage.
Prevention
Centrifuge the sample before transferring it to the insert, not after. If you must centrifuge with the insert in place, use a swing-bucket rotor at no more than 1,000 x g for 5 minutes, and use a polypropylene insert rather than glass.
Failure 8: insert incompatibility with the autosampler tray
Not every insert fits every tray. A 32 x 11.6 mm vial with a 6 mm insert fits a standard 54-position tray, but a 32 x 11.6 mm vial with a 5 mm insert may not sit flush in a tray with tight wells.
Root cause
Tray well dimensions vary between manufacturers. A tray designed for a 12 mm OD vial will not accept a 12.5 mm OD vial, and an insert that protrudes above the vial rim will catch on the tray lid.
How to check
Load a full tray of vials with inserts and check that each vial sits flush in its well. Any vial that rocks or sits high is a problem.
Prevention
Use a tray that matches the vial OD, and confirm the insert’s top rim sits at least 2 mm below the vial’s crimp base. For Agilent and Thermo autosamplers, the tray dimensions are specified in the instrument manual; check them against your vial and insert before ordering.
Decision checklist: choosing the right insert
Use this table to match the insert to the application. The numbers are the ones I use in my own lab and have validated across several instrument platforms.
| Application | Insert volume | Insert material | Sample volume | Needle stop depth | Cap and septum |
|---|---|---|---|---|---|
| Aqueous HPLC, 50 to 100 µL | 150 µL | Glass, polymer foot | 50 to 100 µL | 4 to 5 mm below rim | 13-425, 1.5 mm PTFE/silicone |
| Volatile GC-MS | 150 µL | Glass, silanized | 50 to 100 µL | 4 to 5 mm below rim | 13-425, 1.5 mm PTFE/silicone, crimped 20 to 25 in-lb |
| High-concentration standards | 300 µL | Glass, wide-mouth cone | 100 to 250 µL | 5 to 6 mm below rim | 13-425, 1.5 mm PTFE/silicone |
| Trace analysis, low extractables | 150 µL | Glass, pre-cleaned | 50 to 100 µL | 4 to 5 mm below rim | 13-425, 1.5 mm PTFE/silicone |
| Small volume, below 50 µL | 100 µL | Glass, conical | 20 to 50 µL | 3 to 4 mm below rim | 13-425, 1.5 mm PTFE/silicone |
Troubleshooting checklist
When a run goes wrong and you suspect the insert, work through these checks in order. Each one takes less than five minutes and eliminates a whole class of problems.
- Visual check: Is the insert seated fully? The top rim should be at least 2 mm below the vial’s crimp base.
- Volume check: Is the sample volume at least 60 percent of the insert’s nominal capacity? If not, use a smaller insert.
- Needle depth check: Is the needle stopping 1 to 2 mm above the insert floor? Run 100 injections of water and inspect the needle.
- Carryover check: Run a blank after a 10 mg/mL standard. Carryover above 0.1 percent means the insert or wash step is the problem.
- Evaporation check: Weigh a filled vial at time zero and after 24 hours. A loss above 2 mg means the septum or cap is the problem.
- Contamination check: Run a solvent blank through a new lot of inserts. A phthalate peak above 1 ppb in GC-MS, or a 210 nm drift above 0.5 mAU in HPLC-UV, means the lot is contaminated.
- Compatibility check: Load a full tray and confirm every vial sits flush. Any rocking or high seating is a problem.
What I recommend
Buy inserts and vials as a matched set from one supplier, and qualify each new lot against a known standard before putting it into production. For most HPLC work, a 150 µL glass insert with a polymer foot, a 1.5 mm PTFE-faced silicone septum, and a needle stop depth of 4 to 5 mm below the rim will handle 90 percent of applications. For trace analysis, use a pre-cleaned insert and verify the extractables profile against your method’s detection limit.
If you are sourcing inserts for a regulated lab, ask for a certificate of analysis that includes the insert’s dimensions (OD, ID, internal depth), the material, and the extractables profile. The HPLC consumables market has a lot of low-cost inserts that do not carry this documentation, and the cost of a failed run is much higher than the few cents saved per insert. A chromatography supplier that can provide lot-specific data is worth the premium.
For method development, the U.S. EPA SW-846 test methods give useful guidance on sample handling and insert selection for environmental work. Agilent’s chromatography consumables and columns documentation and Thermo Fisher’s chromatography and sample handling resources both specify the vial and insert dimensions their autosamplers expect, and Restek’s technical resources include useful notes on insert geometry and needle compatibility. Cross-check your insert against the instrument manual before you commit to a lot.
The most expensive insert failure is the one you do not catch. A 30-second visual check at the start of a run, a 5-minute carryover test on each new lot, and a needle depth that leaves 1 to 2 mm of clearance will prevent most of the failures I have described. The rest come down to buying the right insert for the sample volume and material, and qualifying each lot before it goes into production.
References & further reading
Related resources from our lab consumables network:
- Vial Insert at hplcinsert.com
- 2Ml Vial at 2mlsamplevial.com
- Hplc Consumables at hplcconsumable.com
- Chromatography Supplier at chromatographysupplier.com
External references and standards: