

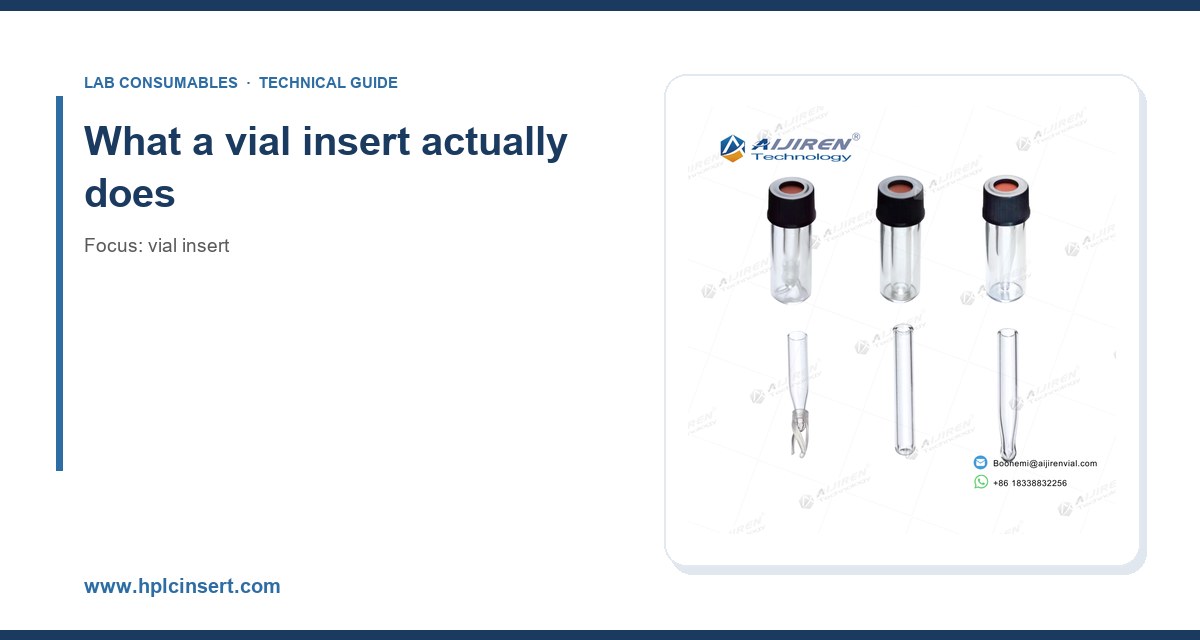
I have lost more hours to a badly chosen vial insert than I care to admit. Early in my lab career, I watched an autosampler needle bend on a glass insert that was seated 2 mm too high, which killed a run of 96 samples and the better part of a morning. Later, I saw a supplier ship inserts with an internal volume that looked fine on the spec sheet but left the injection needle tip drawing air because the bottom geometry was too flat. If you buy or use vial inserts, the details matter more than the marketing copy. This guide is what I wish someone had handed me: how to choose the right insert for your workflow, what to measure, what to ask suppliers, and where the common failure modes hide.
A vial insert is a small glass or plastic tube that sits inside a standard sample vial (most commonly a 2 mL vial) to reduce the effective sample volume and improve sample recovery. The insert raises the liquid level so the autosampler needle can reach the sample even when you only have 100 to 300 µL to work with. It also reduces dead volume, limits evaporation of volatile solvents, and can keep the sample concentrated near the needle path.
The insert is not just a volume adapter. Its geometry, wall thickness, bottom shape, and polymer or glass construction determine how well your autosampler can draw a clean injection, how much sample is left behind, and whether the insert survives the pressure and temperature of your method. For a broader look at insert families and formats, the vial insert catalog at hplcinsert.com is a useful starting point, but the selection logic below is what you should apply before you buy.
The four insert types you will actually encounter
Glass inserts with a pulled point
These are the workhorse. A borosilicate glass tube (usually 5.0 mm or 6.0 mm outer diameter) with a conical or pulled-point bottom. The point concentrates the last 20 to 50 µL of liquid into a small tip so the needle can reach it. Standard dimensions are about 5 x 31 mm for a 2 mL vial with a 6 mm neck, and 6 x 29 mm for wider-neck vials. Glass is inert, compatible with most HPLC and GC solvents, and has a low extractables profile. The trade-off is fragility: thin-walled pulled-point inserts crack if the autosampler needle strikes the side, and they can shatter in the vial during transport.
Glass inserts with a flat or rounded bottom
Flat-bottom and rounded-bottom inserts hold more usable volume but leave a residual dead volume of 30 to 80 µL that the needle cannot reach. They are fine for methods with generous sample volume (500 µL or more) and for analytes where a small loss is acceptable. I avoid them for precious samples or for methods with a 100 µL injection volume.
Polypropylene inserts
Plastic inserts are cheaper, unbreakable, and available in 150 µL to 1.5 mL formats. They work well for ion chromatography, some LC-MS applications, and any workflow where glass breakage is a real handling risk. The catch is adsorption: hydrophobic analytes can stick to polypropylene, and some solvents (certain chlorinated solvents, some ketones) extract oligomers from the polymer. If your method has a low-level detection limit, validate on plastic before you commit.
Insert-and-cap assemblies and fused inserts
Some suppliers offer a vial with the insert molded or fused in place, or a one-piece insert that snaps into the cap. These reduce handling steps and the risk of the insert tipping during transport. They cost more per unit but can be worth it for high-throughput labs where operators load hundreds of vials a day. For high-volume consumables buying, compare the per-injection cost against the labor cost of manual insert placement and the risk of a mis-seated insert.
Selection criteria with real numbers
The table below is the decision checklist I use. The numbers are typical values from mainstream suppliers; confirm against the specific part you buy.
| Criterion | What to check | Typical value / target |
|---|---|---|
| Outer diameter | Matches vial neck and autosampler tray | 5.0 mm or 6.0 mm; confirm against vial neck ID |
| Length | Fits vial without protruding | 29 to 31 mm for 2 mL vials |
| Internal volume | Usable volume above the needle reach | 150 to 300 µL typical; 400 µL for wide-bore |
| Bottom geometry | Pulled point vs flat vs rounded | Pulled point for <150 µL samples |
| Material | Glass (borosilicate) vs polypropylene | Glass for low-level organics; PP for aqueous/IC |
| Temperature rating | Max continuous use | Glass >300 °C; PP ~120 °C |
| Needle puncture rating | Septum/insert durability | Septum 50 to 100 punctures; insert wall resists needle strike |
| Chemical compatibility | Solvent resistance | Glass inert to most; PP swells in some solvents |
| Certification | Extractables / cleanliness | Look for USP <661> and low-extractable claims |
Volume and dead volume
The single most common buying mistake is choosing an insert by nominal volume alone. A 250 µL insert does not deliver 250 µL to the needle. The needle tip sits a fraction of a millimeter above the bottom, and the point geometry determines how much liquid is reachable. In practice, a good pulled-point insert lets you inject from as little as 50 to 100 µL; a flat-bottom insert may need 200 µL or more to avoid drawing air. If your method injects 1 to 5 µL from a 100 µL sample, the pulled point is not optional.
Dimensions and fit
Measure the vial neck inner diameter before you order. A 6 mm insert in a vial designed for a 5 mm insert will sit high and the needle will miss the sample; a 5 mm insert in a 6 mm vial can tip sideways. The insert should sit flush at the bottom with no rocking. I check a batch by dropping ten inserts into ten vials and pressing each with a clean pipette tip; any that rock or protrude get rejected. For 2 mL vials, the standard insert length is 31 mm, and the top should sit 0.5 to 1.0 mm below the vial rim.
Temperature and pressure
Glass inserts handle autosampler tray temperatures and GC inlet temperatures without issue; borosilicate softens well above 500 °C and is rated for continuous use above 300 °C. Polypropylene inserts are typically rated to about 120 °C and will deform if you try to use them in a heated autosampler or a high-temperature GC method. If your workflow includes derivatization at 60 to 80 °C in the vial, glass is the safe choice. Pressure matters less for open-top vials, but if you crimp or screw a cap with a PTFE-lined septum, the insert must not be so tall that it contacts the septum and creates a seal that blocks the needle.
Chemical compatibility
Borosilicate glass is compatible with nearly every HPLC and GC solvent, including acetonitrile, methanol, dichloromethane, and hexane. Polypropylene is fine with water, dilute acids, and many alcohols, but it swells in some chlorinated solvents and can adsorb hydrophobic analytes. If you run trace-level pesticides or PAHs, use glass. If you run ion chromatography with aqueous eluents, polypropylene is acceptable and cheaper. Always run a blank insert through your method before you trust a new lot.
Cleanliness and certification
For trace analysis, ask for the extractables data. Good suppliers provide a certificate of analysis and reference USP <661> for glass containers and USP <88> for biological reactivity where relevant. For environmental work under U.S. EPA SW-846, confirm the insert does not contribute interfering peaks at your target retention times. A quick blank run on a new lot takes 20 minutes and can save a re-run of a full sequence.
Matching the insert to your autosampler
Autosampler geometry is the constraint most buyers overlook. Agilent, Thermo Fisher, Waters, and Shimadzu trays each have different vial heights and needle travel. Agilent’s chromatography consumables and columns documentation lists recommended insert dimensions for each tray type, and Thermo Fisher’s chromatography and sample handling pages give similar guidance. Use those as a cross-check, then verify with a physical fit test.
Three practical rules:
- Needle depth: set the autosampler needle depth so the tip sits 1 to 2 mm above the insert bottom. Too shallow and you leave sample behind; too deep and you strike glass.
- Needle gauge: a 23-gauge needle (about 0.64 mm OD) is standard for most HPLC autosamplers; confirm the insert’s inner diameter clears it with margin.
- Tray height: if you switch between insert types, re-teach the tray or update the method’s vial height parameter. A 2 mm difference is enough to cause a failed injection.
For GC workflows, the insert must also survive the inlet. A glass insert in a 2 mL vial is fine, but if you use a liner in the inlet, do not confuse the two. The vial insert is a sample container; the inlet liner is a vaporization chamber. Restek’s technical resources cover both, and their application notes are a good sanity check when you are unsure which part number you need.
Operational precautions that prevent most failures
Seating and handling
Always seat the insert with a clean, dry tool. Fingers leave oils that show up as peaks. If the insert does not drop in freely, stop; forcing it cracks the wall or chips the rim. I keep a small tray of pre-seated vials ready before a sequence so the autosampler never waits on manual assembly.
Filling
Fill the insert to no more than 80% of its usable volume. Overfilling risks a siphon effect when the cap is crimped, and it leaves no headspace for volatile solvents. For a 250 µL insert, that means about 200 µL maximum. Use a positive-displacement pipette for viscous samples; air-displacement pipettes leave droplets on the insert wall that never reach the needle.
Capping and torque
For screw-top vials, torque matters. Over-tightening a 9 mm screw cap can deform the septum and push it into the insert, blocking the needle. I tighten to about 1.0 to 1.5 N·m by hand with a torque-limited cap driver; that is snug, not gorilla-tight. For crimp caps, use a proper crimper set to the vial’s 11 mm or 20 mm finish and check the seal with a pull test on the first vial of each batch. The GPI thread standard (GPI 9-425 for many 2 mL vials) defines the neck finish; mismatched caps and vials are a common source of leaks.
Transport and storage
Inserts tip during transport. If you ship or move racks, use a vial with a fused insert or a spring-loaded insert holder. Store glass inserts in their original foam or tray; loose inserts in a drawer chip at the rim and the chips end up in your sample.
Troubleshooting checklist
When an injection fails, work through this list before you blame the instrument.
- No sample drawn: insert seated too high, needle depth too shallow, or insert tipped. Re-seat and re-teach the tray.
- Air in the syringe: sample volume below the needle reach. Switch to a pulled-point insert or increase fill volume.
- Bent needle: needle depth set below the insert bottom, or a cracked insert wall. Check depth and inspect the insert for chips.
- Ghost peaks: contaminated insert lot or finger oils. Run a blank and switch to a certified low-extractable lot.
- Analyte loss: adsorption to polypropylene. Switch to glass and re-validate.
- Septum pushed into insert: over-torqued cap or wrong septum thickness. Re-cap to 1.0 to 1.5 N·m and check septum durometer.
- Insert cracked in transit: use fused inserts or foam-packed trays.
Keep a log of insert lot numbers against failed injections. In my experience, a single bad lot shows up as a cluster of failures within the first 20 vials, and the lot number is the fastest way to isolate it.
Buying: what to ask and what to pay for
Price per insert ranges from a few cents for commodity polypropylene to well over a dollar for certified glass with a certificate of analysis. The per-injection cost is what matters. A $0.40 glass insert that prevents one failed 96-well sequence a month pays for itself many times over. When you request quotes, ask for:
- Dimensional tolerance on OD and length (target ±0.1 mm)
- Extractables data and the USP reference used
- Lot traceability and a sample of the actual production lot
- Compatibility statement for your autosampler model
- Packaging format (foam tray vs bulk bag) and breakage rate in transit
For a full consumables program, it helps to consolidate suppliers. A HPLC consumables distributor that stocks inserts, vials, caps, and septums from one warehouse reduces the number of lot numbers you have to track. If you buy across a network, a chromatography supplier with documented quality systems is worth the small price premium over the cheapest marketplace listing.
Recommendation by workflow
Here is the short version I give to new lab managers.
- Trace organics, LC-MS, low-volume samples: borosilicate glass pulled-point insert, 5 x 31 mm, 150 to 250 µL, certified low-extractable, used with a 2 mL vial and a PTFE-lined septum.
- Routine HPLC with 500 µL or more: glass flat-bottom or rounded insert, 6 x 29 mm, or skip the insert and use a full 2 mL vial.
- Ion chromatography and aqueous methods: polypropylene insert, 300 to 500 µL, rated to 120 °C, validated for adsorption.
- High-throughput screening: fused insert-and-vial assemblies to cut handling time and mis-seating risk.
- GC with heated autosampler: glass only, rated above your method temperature, with a septum that tolerates the inlet pressure.
Whatever you choose, buy a small trial pack first, run a blank and a representative sample, and check recovery against your current insert. A 5% difference in recovery on a precious sample is worth the 30-minute trial.
The insert is a small part of the consumables budget and a large part of the data quality. Get the dimensions, material, and bottom geometry right, seat it properly, torque the cap to spec, and log your lots. Do that and the insert disappears into the background where it belongs.
References & further reading
Related resources from our lab consumables network:
- Vial Insert at hplcinsert.com
- 2Ml Vial at 2mlsamplevial.com
- Hplc Consumables at hplcconsumable.com
- Chromatography Supplier at chromatographysupplier.com
External references and standards: