

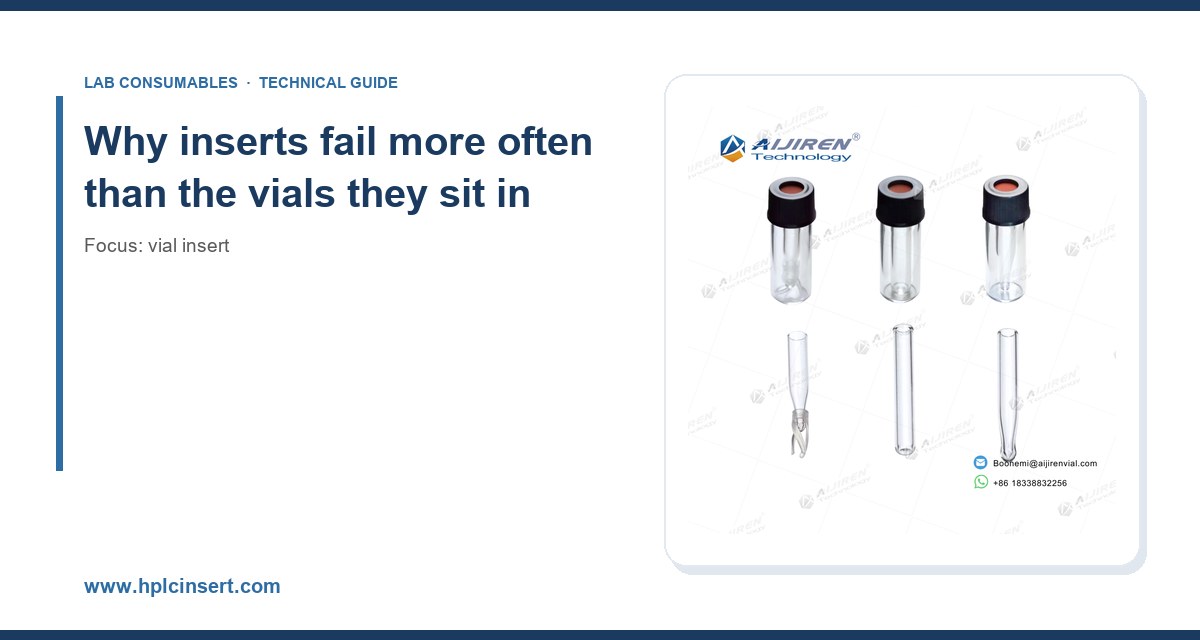
I have watched a vial insert destroy an otherwise clean sequence more times than I can count. The first time was in 2009, on a 96-position autosampler running EPA Method 8270 semivolatiles: 4 of the first 12 injections came back with peak areas 30 to 40 percent low, and the culprit was not the column or the detector. It was a 150 µL glass insert that had walked up out of its 2 mL vial because the spring was too stiff for the shell vial we had bought that quarter. The autosampler needle punched the insert shoulder, bent, and the run was lost. That day cost us a full shift. Since then I have treated inserts as a critical component with a real failure budget, not as a commodity line item. What follows is what I have learned about how inserts actually fail in daily use, why they fail, and what to specify and check so they do not.
A vial insert is a thin-walled glass or plastic cup that reduces the working volume of a standard 2Ml Vial from roughly 1.5 mL usable down to 150 to 300 µL, so that a 10 µL injection can still be drawn from a sample you only have 50 µL of. The physics are unforgiving. The insert wall thickness is typically 0.4 to 0.6 mm, the bottom is a conical or rounded point with a 1 to 2 mm internal radius, and the whole part has to sit concentric with the vial neck to within a fraction of a millimeter so the needle enters cleanly. A 2 mL vial has an outer diameter of 12 mm and a neck opening of about 6 mm; the insert has to pass through that neck and then rest on a spring or a molded shoulder at the bottom. Every one of those interfaces is a place where things go wrong.
Inserts fail in service for a short list of reasons: mechanical misalignment, needle interaction, chemical incompatibility, thermal stress, contamination, and simple dimensional mismatch between insert, vial, and autosampler. The failure modes are predictable, and most of them are preventable at the specification stage. The rest are preventable with a short daily check. I will go through each in turn, with the numbers that matter.
The six failure modes I see most often
1. The insert walks up and the needle strikes the shoulder
This is the single most common failure in my experience, and it is almost always a spring or fit problem. Inserts come in two broad styles: spring-loaded (a stainless or plastic spring at the base pushes the insert up against the vial cap) and friction-fit or snap-in (the insert is held by molded features in the vial or a dedicated insert vial). Spring-loaded inserts are convenient because they work in standard crimp and screw-top vials, but the spring force has to match the vial depth and the cap. If the spring is too stiff, or the vial is a few tenths of a millimeter shorter than the one the insert was designed for, the insert sits proud of the vial mouth. The autosampler needle then comes down at an angle (many towers have a 2 to 5 degree approach offset) and clips the insert rim.
I have measured this. On a bench with a digital height gauge, a nominal 150 µL spring insert in a standard 32 x 11.6 mm crimp vial sat 0.6 to 0.9 mm above the vial rim with one supplier’s spring and flush with another’s. That 0.9 mm is enough for a 23-gauge needle to catch the glass. The fix is to buy insert and vial as a matched pair, or to verify the seated height with a gauge before a run. If you mix brands, check the seated height on a sample of 10 vials; if any insert sits more than 0.2 mm proud, reject the lot.
2. Needle bottoming out and bending or coring the insert
Autosampler needles are set to a penetration depth measured from the vial cap. If the insert bottom is higher than the needle’s programmed depth, the needle hits glass. If it is lower, the needle may not reach the last 5 to 10 µL of sample, which is exactly the volume you bought the insert to recover. The tolerance on insert depth is typically ±0.5 mm from the nominal. On a 150 µL insert with a conical bottom, the usable draw-down is often only 8 to 12 µL above the point, so a 0.5 mm error is a meaningful fraction of the recoverable volume.
Two practical rules. First, set the needle depth so the tip sits 1 to 2 mm above the insert bottom at the deepest point, then verify with a dummy vial and a needle-depth gauge. Second, use a needle with a blunt or chamfered tip for inserts. A sharp bevel tip will core a polytetrafluoroethylene (PTFE) or glass insert and shed particles into the sample. I have seen a cored PTFE insert plug a 0.2 µm frit and take a column offline mid-sequence.
3. Chemical attack on plastic inserts
Glass inserts are inert to almost everything you will run. Plastic inserts are not. Polypropylene inserts are fine for aqueous and many organic samples, but they swell, soften, or leach in strong solvents. I have watched a polypropylene insert turn cloudy and deform within 24 hours in dichloromethane and in tetrahydrofuran. The same insert in acetonitrile or methanol is fine for weeks. If your method uses chlorinated solvents, dimethyl sulfoxide, or anything with a high solubility parameter, specify glass. The cost difference is cents per insert; the cost of a leach peak at the wrong retention time is a failed batch.
There is also the question of extractables. Plastic inserts can shed oligomers and antioxidants that show up as late-eluting baseline noise in LC-MS and as siloxane peaks in GC-MS. For trace analysis at the low ng/mL level, glass is the default. If you must use plastic, run a blank insert through your method first and look at the baseline.
4. Thermal stress and septa interaction in GC
In GC, the insert sits in a hot injector, and the septum and the insert interact. A glass insert is dimensionally stable to well above 400 °C, but the septum above it is not. Repeated injections at 250 to 300 °C cause septa to degrade and shed material that lands on the insert wall and in the sample. That material can catalyze decomposition of labile analytes. I have seen endrin and DDT breakdown rise from under 5 percent to over 20 percent on a single insert that had accumulated septum debris over 80 injections. The insert was not the root cause, but it was the surface where the problem showed up.
The practical fix is to change the insert on a schedule tied to injection count, not to calendar time. For dirty matrices I change inserts every 50 to 100 injections; for clean standards, every 200. And I use a deactivated glass insert for active analytes. A properly deactivated insert is worth the extra cost when you are running pesticides or drugs at trace levels.
5. Particulates and the invisible plug
An insert has a small internal volume and a narrow bottom. A single fiber or a few crystals of precipitated sample can bridge the cone and block the needle path. The symptom is a partial injection: peak area drops 10 to 30 percent, then recovers, then drops again. It looks like an autosampler problem. It is usually a sample prep problem that the insert simply makes visible. Filter or centrifuge samples before they go into the insert, and do not fill an insert above about 80 percent of its nominal volume, because the meniscus can touch the cap or the needle guide.
6. Evaporation and volume loss in long sequences
A 150 µL insert with 50 µL of sample in a vial capped with a standard silicone/PTFE septum will lose volatile solvent over a 12-hour sequence. I have measured methanol loss of 3 to 8 percent over 24 hours at room temperature with a pierced septum, and more with a loose crimp. The result is a drift in peak area that looks like detector drift. Use a preslit or a low-bleed septum, crimp to the correct torque (see below), and keep the sample compartment at 4 to 10 °C if your autosampler supports it. For very volatile solvents, a sealed insert or a vial with a thicker septum is worth the trouble.
Selection criteria with numbers
When I specify an insert, I work through a short checklist with concrete values. This is the table I keep on the wall.
- Volume: pick the smallest insert that holds your sample plus dead volume. A 150 µL insert is comfortable for 50 to 100 µL; a 300 µL insert for 100 to 200 µL. Do not overfill past 80 percent.
- Material: glass (borosilicate 3.3 or equivalent) for chlorinated solvents, trace analysis, and GC. Polypropylene only for aqueous or alcohol-based samples, and never for DCM or THF.
- Bottom shape: conical for maximum recovery (draw-down 8 to 12 µL); rounded for general use. Match the shape to the needle depth.
- Dimensions: the insert must pass the vial neck (about 6 mm) and seat to within 0.2 mm of flush. Verify seated height on 10 units per lot.
- Spring force: matched to vial depth; reject lots that sit more than 0.2 mm proud.
- Deactivation: required for active analytes (pesticides, drugs, phenols). Ask for the deactivation certificate.
- Temperature: glass is fine to 400 °C+; the septum is the limit, not the insert.
- Puncture count: plan on 50 to 100 injections per insert in dirty matrices, 200 in clean ones. Retire the insert at the count, not when it looks bad.
- Compatibility: confirm the insert, vial, cap, and autosampler are a matched set. The GPI 13-425 and 8-425 thread standards and the ISO 4796 vial dimensions are the references to check against.
For a broader view of the consumables that go with inserts, including caps, septa, and filters, the Hplc Consumables catalog is a useful cross-reference when you are building a matched set.
A comparison checklist: glass vs. plastic, spring vs. friction-fit
Most insert decisions come down to two axes. Here is how I decide, with the numbers that drive the choice.
- Glass, spring-loaded: best general-purpose choice. Inert, dimensionally stable, works in standard crimp and screw vials. Watch the seated height and the spring force. Cost is modest. My default for LC and GC.
- Glass, friction-fit/snap-in: best concentricity because the vial holds the insert. Fewer walk-up failures. Requires a dedicated insert vial, so it is a system purchase, not a drop-in. Worth it for high-throughput autosamplers where a single misseat costs a plate.
- Plastic (polypropylene), spring-loaded: cheapest, fine for aqueous and alcohol samples, and useful when you need a pierceable or deformable seat. Not for DCM, THF, or trace work. Expect extractables.
- Plastic, friction-fit: good for biological samples where breakage is a concern. Same solvent limits apply.
If I had to pick one configuration for a mixed lab, it would be a glass, spring-loaded 150 µL insert with a conical bottom and a deactivated surface, matched to a 12 x 32 mm crimp vial with a 13-425 GPI thread and a silicone/PTFE septum, verified for seated height at receipt. That covers 80 percent of what most labs run.
Operational precautions that actually prevent failures
Receiving inspection
Do not trust the certificate alone. On receipt, pull 10 inserts from each lot and check three things: seated height in a sample vial (should be flush to 0.2 mm), concentricity (the insert should not rock), and visible defects (chips at the rim, cracks at the cone). A chipped rim is a needle strike waiting to happen. I reject any lot with more than one defect in 10.
Capping and torque
For crimp vials, the crimp torque and the crimp height matter. An over-crimped vial distorts the septum and can push the insert down or tilt it. An under-crimped vial leaks and loses solvent. Use a crimper with a depth stop set to the vial manufacturer’s specification (commonly 5.5 to 6.0 mm crimp height for 11 mm crimp vials) and check with a go/no-go gauge every 50 vials. For screw vials, hand-tight plus a quarter turn is usually right; over-tightening deforms the septum and can crack the insert rim.
Needle depth and alignment
Set the needle depth with a gauge, not by eye. Verify alignment (the needle should enter the vial neck without touching the sides) at the start of every sequence. A 1 mm lateral misalignment at the needle guide becomes a 2 to 3 mm error at the insert bottom on a long needle. If your autosampler has an alignment tool, use it.
Sample prep
Filter or centrifuge. Do not fill past 80 percent. Do not leave an insert half-full in a hot autosampler tray for a 24-hour sequence without checking for evaporation. And do not reuse an insert across different samples without a solvent rinse and dry; carryover between inserts is real, especially for lipophilic analytes.
Temperature and storage
Keep the sample compartment cool. For volatile solvents, use a low-bleed septum and a sealed cap. For GC, watch the septum bleed and change it on the same schedule as the insert.
Troubleshooting checklist
When a sequence goes wrong, I work through this list in order. It saves time because it separates insert problems from column and detector problems.
- Peak areas drifting down 10 to 40 percent: check for a partial injection. Look at the insert for a particulate bridge or a low sample volume. Check the needle depth.
- Sudden loss of all peaks from one vial position: the insert walked up or the needle bent. Pull the vial and inspect the insert rim.
- New late-eluting peaks or baseline noise: plastic insert extractables or septum debris. Switch to glass and a low-bleed septum.
- Peak area drift over a long sequence: evaporation. Check crimp height, septum type, and sample compartment temperature.
- Breakdown of labile analytes rising: insert surface activity or septum debris. Use a deactivated insert and change it on the injection count.
- Needle coring or particles in the sample: sharp needle tip or a cored plastic insert. Switch to a blunt tip and glass.
- Insert will not seat: dimensional mismatch. Measure seated height and reject the lot.
For method-specific guidance, the U.S. EPA SW-846 test methods for waste and materials are a good reference for sample handling and prep, and the Restek technical resources for chromatography have practical notes on inserts and injection techniques that I have used for years.
Where to source and what to ask for
Buy inserts from a supplier who can give you the dimensional drawing, the material certificate, and the deactivation certificate. Ask for the seated height specification and the spring force. Ask whether the insert is qualified for your autosampler model. A good Chromatography Supplier will have that data on file; a commodity reseller will not. For reference on how the major instrument makers specify their own consumables, the Agilent chromatography consumables and columns pages and the Thermo Fisher chromatography and sample handling pages are worth reading before you write a specification.
If you are standardizing a lab, start with the Vial Insert range and build a matched set of vial, insert, cap, and septum from one source. Mixing brands is where most of the failures I have described begin.
My recommendation
Specify a glass, spring-loaded, 150 µL conical insert with a deactivated surface, matched to a 12 x 32 mm crimp vial with a 13-425 GPI thread and a silicone/PTFE septum. Verify seated height to 0.2 mm on receipt, set needle depth to 1 to 2 mm above the insert bottom, crimp to a 5.5 to 6.0 mm height, and retire inserts at 50 to 100 injections in dirty matrices and 200 in clean ones. Keep the sample compartment at 4 to 10 °C for volatile solvents. That combination will prevent the walk-up, needle-strike, extractable, and evaporation failures that account for most of the lost sequences I have seen. The rest is sample prep discipline, which no insert can fix for you.
The takeaway is simple: an insert is a precision part with a tolerance, a material, and a service life, and it fails on all three if you treat it as a disposable cup. Buy it matched, check it on receipt, set the autosampler to its dimensions, and change it on a count. Do that and the insert stops being the thing that ruins your Monday.
References & further reading
Related resources from our lab consumables network:
- Vial Insert at hplcinsert.com
- 2Ml Vial at 2mlsamplevial.com
- Hplc Consumables at hplcconsumable.com
- Chromatography Supplier at chromatographysupplier.com
External references and standards: